Mabinogi World Wiki is brought to you by Coty C., 808idiotz, our other patrons, and contributors like you!!
Keep this wiki going by contributing to our Patreon!
Belvast Hostage Rescue
Description
| Fomors within Belvast have revolted and taken hostages. You and your party must rescue them. |
- Of all Shadow Missions, Belvast Hostage Rescue is by far the most complex mission, consisting of four wildly different sections.
- By far the most difficult Lord Mission, with exceedingly strong monsters, high complexity, and the generally heavy rendering area of Commonwealth of Belvast.
Part One
- To begin Belvast Hostage Rescue, all players must stand within the circle that appears while the Party Leader talks to the Hidden Agent.
- At this point, all players in the Party will be put into a slow-walk form of Hide (similar to that of G13 Hamlet's Unraveling Truth and G14 Romeo and Juliet's Romeo's Courage).
- The Party must move through Belvast between similar circles, which are called checkpoints.
- At each checkpoint, all players in the Party must stand within the circle while the Party Leader talks to Hidden Agent.
- The mission may only continue as the Party does this at each checkpoint in order.
- There are untargetable enemy NPCs wandering around. Going too close to one will drop the special Hide of all Players and spawn targetable enemies.
- The strength of these enemies increases between checkpoints.
- The number of enemies that spawns when caught scales off of the number of players in the Party.
- Enemies are spawned around each player.
- The number of enemies that spawns when caught scales off of the number of players in the Party.
- The strength of these enemies increases between checkpoints.
- Players are rewarded 10,000~20,000 Experience Points if they successfully manage to sneak past the enemies.
- However, it can be considerably faster to defeat the enemies rather than to try to sneak the entire way.
- There are Barrier Spikes spread throughout the area. These Barrier Spikes will reflect some damage and will block certain pathways.
- During the transition before the third checkpoint players can destroy the Barrier Spikes before starting to open a path to go around the mobs entirely.
- The mission enters the next part when the third checkpoint is reached and the Hidden Agent is talked to.
Part Two
- The Hidden Agent will disappear to retrieve the hostages.
- At this time, all party members should prepare for battle.
- After a few moments, a large number of extremely strong enemies will spawn.
- Once all the enemies are eliminated, the mission moves to the next part.
Part Three
- The Party must lead the Hostages to the boat by the docks.
- A Hostage will spawn for each player in the Party.
- If all Hostages die, the mission fails.
- Hostages will lock onto the nearest player, alternating between following them and stopping.
- The Hostages' lock-on range is fairly short, so players must remain close in order to have the Hostages move and follow.
- Players should only move in straight paths as diagonal paths will tend to get the Hostages stuck behind objects.
- Waves of monsters will spawn every 30 seconds, and all monsters must be defeated before proceeding.
- Enemies will spawn around the Hostages.
- The number of enemies spawned is 1~2 per Hostage.
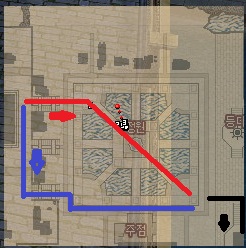
- At this point, two different routes may be taken.
- The mission is complete when all the remaining Hostages are in the boat area.
Mission Information
- Quest Board Location: Tara
- Party Size: 1~8
- Time Limit: 60 minutes
- Mission Details: Fomor rebels have taken Belvast citizens hostage. Infiltrate the Fomor base and rescue the hostages, then get them safely to port.
- Info: Rescue the hostages.
- Requirements: One Master Talent and a Lord Pass for each member of the party.
Monsters
- Goblin Humanoids
- Rat Man
- Argus
- Imp
- Ogre Executioner
- Armor Skeleton Ogre
- Skeleton Hellhound
- New Gremlin
- Giant Skeleton
- Golems (Various Types)
Rewards
- Experience: 196,000
- Gold: 34,000
- Enchants
- Prefix
- Suffix
- Crafting Materials
- Miscellaneous
- Blacksmith Manual - Demonic Abyss Cylinder
- 8~9 Cm Gems (All types)
Trivia
- Tory Ravine's gateway is active during this mission, likely due to an oversight created when Belvast was updated to it.
- Attempting to enter Tory Ravine will force the player to exit the mission, and appear in Tory Ravine instead of Tara.
