Mabinogi World Wiki is brought to you by Coty C., 808idiotz, our other patrons, and contributors like you!!
Keep this wiki going by contributing to our Patreon!
Feth Fiada
- For other Tech Duinn missions, see Category:Tech Duinn Missions.
| Mission Information | |
|---|---|
| Time Limit | ±20 Minutes |
| Party Count | 1~4 |
| Quest Board Location | Tech Duinn |
| Minimum Level | None |
| Minimum Total Level | 3,000 |
—Marleid |
Description
- Phase 1: The party must find orbs hidden in the fog and defeat the summoned monsters.
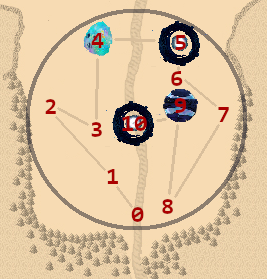
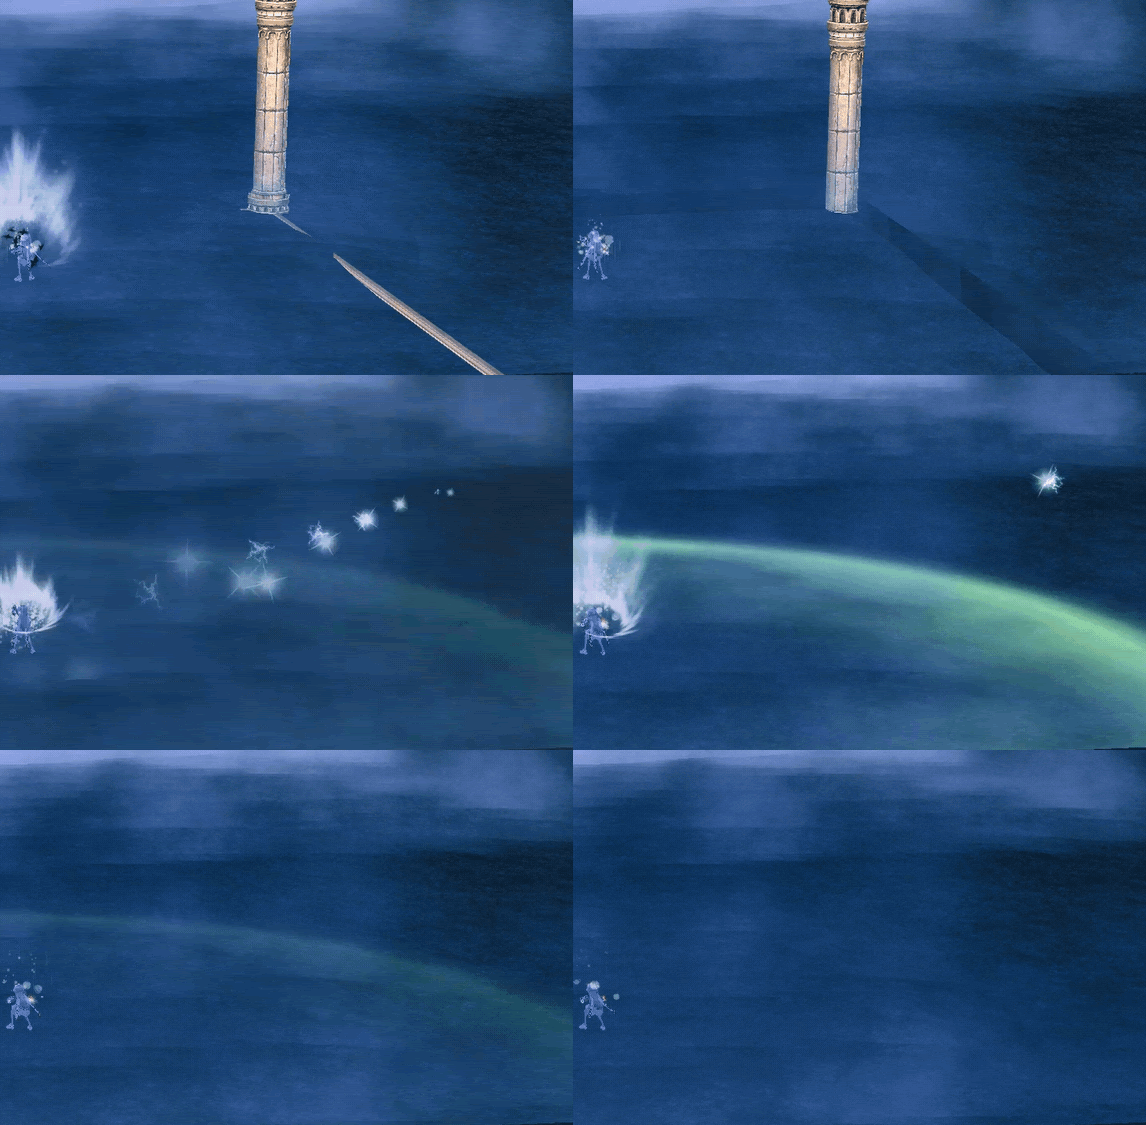
- The first orb is located left of the spawn location, slightly left of the player facing towards center. Upon defeating the summoned monsters a glimmer of light will point in the direction of the next orb.
- A sparkling light will shimmer to indicate where the next orb will be.
- This is more needed on Hard than Normal.
- The sparkling light lasts quite a while, but the direction it hints at could be either ahead or behind the player.
- The pattern for the orbs will always be the same on Normal and will always be random on Hard.
- A sparkling light will shimmer to indicate where the next orb will be.
- Slime Rooms:
- Fire: Regenerates health every few seconds. (Amount increases based on difficulty)
- Ice: Very fast and teleport every few seconds.
- They can be frozen with pets & Frozen Blast.
- Lightning: Becomes immune to damage for ? (depends on difficulty) seconds if knocked down.
- Tathlum Rooms:
- Before a Tathlum begins to roll, it will begin to count down with chat bubbles.
- After three lines of ellipses, a fourth line ending in an exclamation mark will signal the Tathlum beginning to roll.
- Tathlums will have a long red line indicating where they will roll to. They can still be hit during this attack. Being Divine Linked to a pet is strongly recommended, especially during solo combat.
- Tathlums are vulnerable to many forms of stuns and snares.
- They can be frozen with Elemental Wave Frozen Blast, an Ice Dragon's Ice Storm, and a Lil Jack's Jack's Garden.
- They can be stunned by a Scooter's Burnout, a Patrasche's Earth Dragon Roar, and a Kokopo's Kokopo Wave.
- They can be stunned by a Sheeptuplet's Wool of the Gods.
- They can be stunned by a Scooter Imp's Oil Squirt and an Alto's Dance Party.
- They can be blinded by Sand Burst.
- They can be put to sleep by a Spirit of Tuan's Song of Tuan.
- On Hard difficulty, they can use Snap Cast, Fireball and Lightning Rod.
- Before a Tathlum begins to roll, it will begin to count down with chat bubbles.
- Illusion Zombie Rooms: Zombies appear in a giant hallway after clearing the first 3 orbs, and also randomly appear as one or several enemies during normal orb spawns.
- Zombies have about 10,000 HP in Normal and 60,000 HP in Hard.
- The Zombies in the hallway have to be killed consecutively under a time limit. Failing to kill the mobs in the time limit will reset the room.
- An orb will spawn when all the zombies are killed, but still needs to be hit quickly before the timer resets the room again.
- As the zombies have a fairly high health pool, it's recommended to use skills that can deal major amounts of damage without knocking them down until they're KO'd.
- They can be frozen with pets & Frozen Blast.
- Illusion Salamander Rooms: Spams Thunder and Shockwave.
- Spawns less often on Normal.
- On death, they will drop an AoE, where the players Health, Mana, Stamina and Dorcha will be drained rapidly over time.
- They can be frozen with pets & Frozen Blast.
- Mixed Rooms: Occurs in higher difficulties as well as after clearing the Zombie Hallway.
- Can be a mix of various slime colors, and/or a mix of various monsters.
- Requires players to combine strategies of single-mob rooms.
- The first orb is located left of the spawn location, slightly left of the player facing towards center. Upon defeating the summoned monsters a glimmer of light will point in the direction of the next orb.
- Phase 2: The party must defeat a series of Illusion Zombies before the timer runs out to summon an orb.
- Zombies in the Hallway will not attack players. The best method is to use quick high damage single hit, single target skills.
- Normal: Zombies spawns in a straight line. Time limit is longer.
- Hard - Zombies spawn in a straight line.
- Zombies in the Hallway will not attack players. The best method is to use quick high damage single hit, single target skills.
- Phase 3: The party must locate and defeat the Tech Duinn Geata.
- Phase 4: The party must find orbs hidden in the fog and defeat the summoned monsters similar to Phase 1.
- Phase 5: The party must defend against an onslaught of Tathlum, and prevent them from reaching the gate.
- If 6 of the Tathlum reach the mark at the beginning of the room, the whole spawn resets.
- Tathlums will not attack, and cannot be stunned, frozen, etc.
- It's advised to use Sorrow Sonata from Fantastic Chorus & Grudge of Tuan by a Spirit of Tuan pet in order to slow down the rollers in this phase.
- The orb to exit this phase spawns at the beginning of the room after defeating a number of Tathlum's, and does not(?) require being hit under a time limit unlike the Zombie Hallway. The orb will activate a cutscene and spawn in the final Geata boss.
- Phase 6: The party must locate and defeat a stronger version of Tech Duinn Geata.
Notes
- There is a starting time limit of 20 minutes.
- This will increase/decrease when a Black Moon Follower is killed/escapes.
- Black Moon Followers can share similar attributes to monsters in the mission.
- Some may regenerate quickly like Fire Slimes.
- Black Moon Followers will have a time bar underneath them that says "Disappearing" to indicate when they will vanish. Failing to defeat them will result in penalizing the remaining time limit, whereas defeating them adds more time.
- This will increase/decrease when a Black Moon Follower is killed/escapes.
- The outer edges of the screen will start to flash when the timer is close to finishing. The flashing will get more intense and faster as the timer approaches zero.
- On Hard difficulty, the placement of the hidden spawn orbs is random.
- Be on the lookout for sparkles after clearing an orb, as it will indicate a direction where the next orb has spawned.
- The sparkles are in a cone shape, and players should traverse the general direction in which the cone spreads. The direction may not always be straight ahead from where the cone indicates the next orb.
- The sparkles will disappear after some time.
Map
Warning: Map cannot be viewed during this mission.

Monsters
- Regular Spawns (Phase 1 & 4)
- Illusion Salamander
- Illusion Zombie (Phase 2)
- Fire Slime
- Ice Slime
- Lightning Slime
- Tathlum (Phase 5)
- Black Moon Follower (Mage) (x1 may accompany a wave of the above).
- Miniboss (Phase 3)
- Boss (Phase 6)

