Mabinogi World Wiki is brought to you by Coty C., 808idiotz, our other patrons, and contributors like you!!
Keep this wiki going by contributing to our Patreon!
Guide:Girgashiy Raid
| Current Server Time | |||
|---|---|---|---|
|
type=rotate label={} epoch=2016-01-31T00:00:00S change-every=24:00:00 display=status displayStyle={display:inline} labelStyle={} entryStyle={} timeStyle={} valueStyle={display:inline} listStyle={}
| |||
| Public raid schedules Edit | |||
| Alexina | Nao | ||
|
Call for raids
type=rotate label={Starts in } epoch=2017-12-03T07:00:00S change-every=24:00:00 remaining=1 display=countdown output={%t} displayStyle={} labelStyle={} entryStyle={} timeStyle={} valueStyle={} listStyle={}
|
Daily Normal modes
type=rotate label={Starts in } epoch=2017-12-03T17:00:00S change-every=24:00:00 remaining=1 display=countdown output={%t} displayStyle={} labelStyle={} entryStyle={} timeStyle={} valueStyle={} listStyle={}
| ||
Information and guides for the Girgashiy raid.
Intro
Girgashiy, Greg, Giggleface... whatever name you call the boss, taking part in the Girgashiy (Raid) can be fun and rewarding. However unlike most other parts of the game, raids require a party taking on separate roles. You cannot DPS your way past this, because the boss has special damage resistances of over 99%. It requires multiple different skills in tandem to temporarily lower Girg's defenses and deal damage. The different skills have a shared cooldown, so one person cannot do everything themselves.
Note: The following guide only covers the easy through hard difficulties. Very hard has many changes and different mechanics that require a radically different approach outside the scope of this guide.
Rewards
Why bother to find a matching party and learn a complex fight?
- Experience, 100K-250K for normal/hard (runs can be repeated).
- Skill training in powerful and useful skills, see the videos on the right.
- Judgment Blade is a large AoE with a high damage multiplier.
- Celestial Spike is a DoT that bypasses invulnerability.
- Shield of Trust can heal and speed up party members.
- Subskills to buff crusader skills with additional benefits.
- Materials for Apostle Weapons.
General Overview
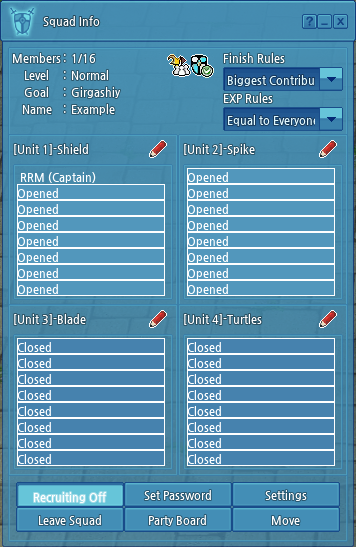
1. Players meet up at the raid entrance, make/join a squad, get assigned roles, and enter the mission.
2. The squad tries to avoid attacks and stay alive until Girgashiy uses Mineral Hail.
3. The shielders use Shield of Trust to defend against the attack.
4. The spikers use Celestial Spike to bind Girgashiy.
5. The bladers use Judgment Blade to damage Girgashiy.
6. Girgashiy stands back up and the process repeats from step 2.
Basic Advice
- Don't panic.
- Once you've seen the attacks and know how to react to them, it's a simple matter of making sure everybody reacts properly and does their role.
- Most of Girgashiy's attacks are %HP based and thus, on easy/normal, cannot one-shot you.
- Stick with the group.
- Do not run away further than you need to. Shielders can only protect you if you're close, and running away from the boss will actually attract his attention because he lands on the furthest away player after a jump. If you're far away people can't easily/quickly free you from attacks, and it generally makes the rest of the party go through more trouble than they have to. Please just stick with the group.
- Don't transform.
- Unless you absolutely need to for Blade damage or to gain enough bonus HP to survive a sudden attack. Most of Girgashiy's attacks are %HP based, and so transforming for higher defensive properties and more HP only helps against Staff Swing. It can actually be detrimental because you take more HP damage from many attacks (since you have more total HP) and so there's more HP (and wound) damage you take that has to be recovered by whatever healing is available.
Crusader Roles
Taking down Girgashiy requires teamwork. Three skills are involved, but they share a cooldown so a player can only handle one role at a time. I highly recommend you read the skill pages for these, as they include lots of additional info on the mechanics that I won't cover here. This includes things like the minimum number of shielded players needed per difficulty, and the minimum spiking level per difficulty.
Generally the leader will ask who is going to be in which role, and the squad screen will be divided into 1/2/3 as Shield/Spike/Blade. It's important to make sure that there's enough Shielders to stun Girgashiy after Mineral Hail, and enough Spikers to bind him properly. The number required depends on difficulty and ranks respectively, and is detailed in the skill articles.
Shielder
The defender, using Shield of Trust. Your job is to recognize when Mineral Hail is coming in order to defend yourself and nearby party members against it. Subskills, once obtained and ranked up, will also grant your Shield healing and buffing properties.
- Suggested Stats: None. The defensive properties are purely based on skill ranks.
- Suggested Gear: Dowra SE, and whatever else for your support role.
Spiker
The binder, using Celestial Spike. After Girgashiy has been stunned by Mineral Hail being defended against, the Spiker uses Celestial Spike on the Girgashiy when he lands. If the spiking is strong enough (and done soon enough), Girgashiy will fall to one knee and be stunned longer. In this state, it is most susceptible to the next skill.
- Suggested Stats: None. The lockdown properties are based on skill ranks.
- Suggested Gear: Dowra SE, and whatever else if also doing a support role.
Blader
The attacker, using Judgment Blade. After Girgashiy has fallen to a knee (which can take a few seconds after being spiked), Bladers drop their blades on him, dealing proper damage. Subskills can add additional detrimental effects to Girgashiy, as well as greatly increasing the damage dealt with the attack.
- Suggested Stats: As high as you can manage for your damage Also consider temporary buffs, like Bone Dragon Chips from Bone Dragons.
- Suggested Gear: A red-upgraded lance with lots of piercing/damage, and Dowra SE. If you're an elf, piercing ranged weapons like the Celtic Royal Crossbow paired with Sharp Bolts or a Bhafel Hunter with the Bhafel Huntress will do well.
Subskills
In the bottom-left of the Crusader skill tab, you can click Manage Skills to access the subskills menu. Here you can freely allocate points to your subskills. Some subskills are more useful than others for raids, and the number of points available to you depends on your Crusader Level. Only subskills determined to be useful to raids will be mentioned here.
Shield of Trust
- Giving Heart: Lets you shield players from a further distance away. Pretty useful because players aren't always standing on top of a shielder, and Girgashiy likes to smack people around.
- Healing Hands: Restores up to 150 HP. Useful for recovering bit-by-bit from various attacks to both you and the people you shield.
- Guarded Footsteps: Grants a temporary speed increase to affected players. Helps Spikers and Bladers reach the fallen/stunned Girgashiy faster.
- Recovering Touch: Recovers a percent of wound on affected players. Very helpful for players that got caught in crystals.
Celestial Spike
- Spreading Faith: Increases the range at which you can use the skill. This makes it easier for a Spiker to affect Girgashiy if Girgashiy landed on a far-away player after a jump.
Judgment Blade
- Binding Needle: Increases the amount of time Girgashiy stays stunned. Considered pretty important in groups, generally Bladers will be put into a "blade order" based on the rank of Binding Needle. This is because if the players with the highest ranks hit first, they increase the time left for more blades to hit Girgashiy.
- Breaking Lies: Reduces Girgashiy's special defenses against your attack, causing blade to deal more damage.
- Christening Blades: Increases the damage dealt with a critical hit, very useful.
Support Roles
In addition to the three main roles, there's some support roles that can make the raid easier. Some players will do support roles in addition to their main role.
- Buffing
- Battlefield Overture helps a lot. Catering also helps, but is not used as often due to the hassle. Vivace is useful during Fanatacism (Grabs) for more rapid attacks from the party. Any role can be a buffer (since the effect is quick to trigger and lasts a long time), generally picked based on who gives the best bonuses.
- Debuffing
- Spinning Uppercut's debuff and the on-summon debuff of the Bone Dragon and Mir Dragon (they stack) can be helpful.
- Party Heal
- People are constantly taking damage, so Party Heal is a very useful skill, especially with any enhancements such as the master title. It's generally easiest for Shielders to also be the healers, since they're not doing anything after defending Mineral Hail while the rest of the players are scrambling over to Girgashiy. Shielders can use this time to heal/mend the group as needed, and can even start loading Party Heal when Mineral Hail is still coming down, as the Advanced Heavy Stander effect of Shield of Trust will allow Party Heal's loading to continue through the attack.
- Support Shot / Rage Impact
- Girgashiy will take more damage if he's under the effects of Support Shot, simply enough. Rank 5+ recommended for the firing speed (so you can fire it off for each Blader in turn), rank 1/master title of course recommended for the best buff to damage. Items of the Bohemian Set set with 10 total points in Support Shot Enhancement will help as well. Rage Impact's debuff helps too, but is not as strong as Support Shot. However if Girg is hit with Support Shot right after Rage Impact, they can stack without overwriting eachother (as the Rage Impact status takes a second to apply).
Girgashiy's Attacks
No matter how good you are at your role, a dead party accomplishes nothing. Learning how to deal with Girgashiy's attacks is essential.
Staff Swing
- Attack: Girgashiy swings his staff. Hits everybody in an arc and knocks them back. Very basic, uses it constantly, the attack deals normal levels of damage but can be disruptive. It can knock you back pretty far from the group if you get hit a few times.
- Response: Avoidance. Stand underneath him, behind him, or far enough away from the arc of the attack and it won't hit you.
Mineral Hail
Mineral Hail (Hail)
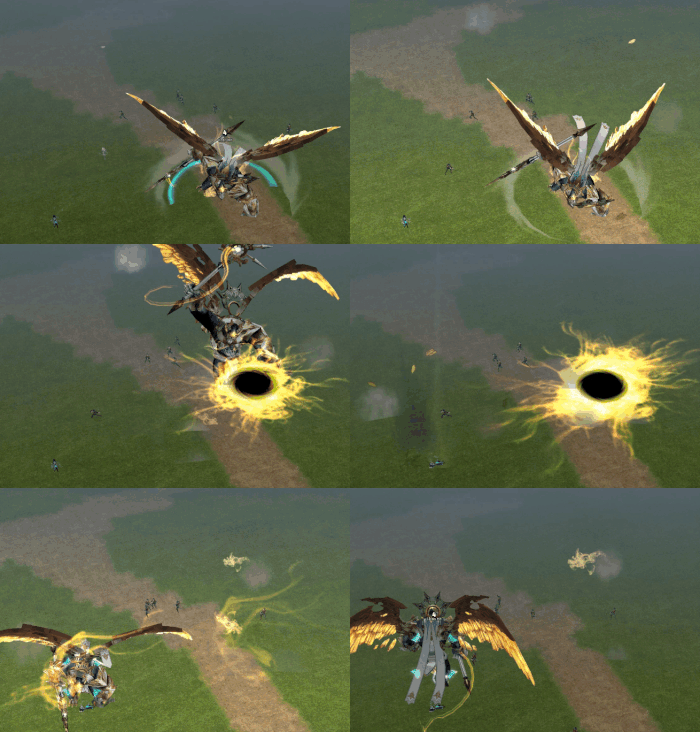
- Attack: Girgashiy crouches down while black and yellow portals appear over every player. After a few seconds, Girgashiy jumps, and a hail attack hits everybody in the squad. This attack deals a percent of your max health in damage, depending on the difficulty.
- Response: Shielders should use Shield of Trust as soon as they can. There's a small bit of leeway, but Shield's main effects lasts longer than the attack so it's best to fire it off the moment you see Girg take the pose, see the clouds, or hear the attack. This will reduce the damage dealt to shielded players (up to 100% reduction at rank 1) and will stun Girgashiy, allowing the Spike->Blade combo to damage him. If you're not a Shielder and not close enough, you can ride/hide inside a Mimic pet (yours or another player's), which will reduce the damage you take.
Holy Confinement
Holy Confinement (Crystals)
- Attack: Girgashiy hits the ground with his staff, causing giant crystals to form over random party members. These crystals cancel skills and immobilize players, while dealing steady wound damage.
- Response: Attack the crystals. This is one situation where Dual Guns are handy as they can rapidly free multiple players within shooting range. If you're in a crystal yourself, you could try summoning multiple pets with AoE effects to damage the crystal enough to free yourself.
Holy Contagion
Holy Contagion (Poison)
- Attack: Girgashiy thrusts his staff through the air, and random players will be affected. Players who are poisoned will have a purple ring around them, and will lose health over time.
- Response: Spread out. If you get within another player's ring, the poison effect will spread to you (and you can spread it to others if you move too close to them). Players can infect eachother back and forth, so if people are running around randomly it can easily make the poison last longer than needed. Circles can overlap without penalty, as long as a player is not within another player's circle the poison will wear off within a few seconds.
Fanaticism
Fanaticism (Grabs)
- Attack: Girgashiy grabs a player and lifts them up, charging an attack. A green bar appears over his health bar, and if allowed to complete the attack Girgashiy will stab the grabbed player. This deals lots of damage, heavily wounds, and sends the grabbed player flying back a huge distance.
- Response: Attack Girgashiy as rapidly as you can. Also summon a pet and command it to attack Girgashiy as well. The green bar above Girgashiy's health is an attack bar, and the number on it is scaled to a multiple of the current squad size. Girgashiy needs to be attacked that number of times in order to drop the player he's holding. Damage does not matter, purely the number of attacks that hit. This move is one of the main reasons I recommend Dowra SEs, as guns they attack twice per normal attack and they have large magazines and potential for a long range. Make sure to desummon your pet if Girgashiy uses Mineral Hail afterwards, it's easiest to set a desummon hotkey and spam it in case of client lag.
Soul Absorption
Soul Absorption (Souls)
- Attack: Girgashiy grabs his staff with both hands and smoke begins pouring out of it. A purple health bar appears above his normal one, and clones of players spawn on top of the actual players. The clones will run towards Girgashiy, and if they reach him the associated player will immediately die and Girgashiy will also restore some of his own health.
- Response: Keep your distance from Girgashiy, and attack. The purple bar is the amount of incoming damage (before his special apostle defense) that needs to happen in order for the soul attack to cancel. You can use gun skills, archery, Lance Charge, or even Final Hit's teleportation to deal enough damage to Girgashiy before the souls reach him. Attacking a soul will cause it to stop moving for a second or two, so you could attack the souls of you and nearby players to delay their death long enough for the attacks to deplete the purple bar.


