- For specific animations/motions that your character can perform, see Gesture.
- For animations/motions representing Shakespeareian characters, see Persona.
Basic Information
Actions are similar to skills, but are fixed at one "rank", that is, they cannot be improved. All actions have a green background. The Action tab is defaulted hotkeyed as N.
Actions
Normal Attack

|
Triggers a normal attack. Easy to use after targeting a monster.
- Learned automatically upon character creation.
- Normal Attack simply involves melee attacking the monster with a weapon. Clicking on the enemy will trigger this action.
- Normal attacks builds up the Knockdown Gauge as listed on the weapon. For example, a 3 Hit weapon will completely fill up the gauge and knock down the enemy after three normal attacks.
- The enemy will temporarily receive invulnerability frames after being knocked down by normal attacks.
- Normal attacking an enemy with another enemy right next to it may inflict Splash Damage.
- Splash damage only causes the targeted enemy to aggro, but may place the splashed targets to be on alert state though this depends on the enemy.
- Colossus and Pierrot Marionettes' normal attacks will never deal splash damage.
- Enabling Auto Combat results the player relentlessly attacking the selected opponent with a normal attack.
- Reserve Attack as well as Intuition have a chance to intercept normal attacks.
- Normal attacks will always interrupt Smash and Flash Launcher.
- Normal attacks have a chance to interrupt Charge, Dischord, Act 1: Inciting Incident and Act 2: Threshold Cutter.
- When normal attacking an enemy with Windmill loaded, it will immediately respond by executing Windmill.
- Normal attacks will never intercept Fighter Skills.
|
Play Dead


|
The action pretending you are totally incapacitated. You are just pretending so people will most likely not be fooled all that easily, but if you are actually getting attacked by a monster, this action is worth trying. Just pretend that you are dead and lie there for a while. You may actually fool the monster afterall, which may, in the end, save your life.
- Elves learn this skill automatically upon character creation. Humans learn it after completing the quest Tracy's Escape Route. Giants cannot learn Play Dead.
- The user will fly backwards onto the ground in a slightly diagonal direction of about 300 distance and pretend to be Knocked Unconscious. Most monsters will not attack a Playing Dead player and will eventually drop aggro after approximately a minute or more, depending on the monster.
- Males and females have different Play Dead poses. These poses are also dependent on the equipped weapon (e.g. Lances).
- Some monsters, such as Cat Sith Knights, will ignore the player's Playing Dead status and attack.
- Area of effect attacks, such as Windmill or Fireball, may still be executed by the monster.
- The monster might also attack if Playing Dead is used after a luring attack (e.g. Icebolt).
- If the player is too close to the monster when they use Play Dead, they may hit the player during the flying backward animation.
- Giant players and enemies cannot knock out a faker with Stomp.
- Other players can still attack a player using Play Dead.
- Other player's Pets cannot attack a player using Play Dead. However their owner can command it to still target the player.
- Play Dead makes the player vulnerable to Assault Slash.
- A player may summon pets to draw the target's attention away and then dismiss the pet. It may take several attempts to make it more effective.
- Can be used immediately without flying animation after being knocked down.
- Frozen Blast will not cancel Play Dead even though the icon is temporarily deactivated.
- It takes about three seconds to 'get up' from Play Dead.
- If you try to get up while being targeted, the monster may attack you.
- You may summon pets and command them to attack while Playing Dead.
- Play Dead drains 0.5 Stamina per second during use, however the skill will not cancel after reaching 0 stamina.
- Elves cannot use Hide during the Play Dead "get up" animation. The animation has to be completed before Hide can be used.
|
Jam Session

|
If you are aware of this action, then you may hold a Music Jam Band. When a fellow party member uses this action, then the party members will have their instruments and scores all set up, ready to play. When the leader of the party uses this action, that's when the playing begins. This action is only available to those with Rank F or above in Playing Instrument.
- Requires at least Playing Instrument at Rank F in order to learn. Once these requirements are met, the player will soon receive the quest Beautiful Harmony, Jam.
- By using this action, the player will prepare the use of a musical instrument while in a Jam Band party.
- When the party leader uses this action, all players who have prepared Jam Session and/or Chorus will begin playing songs at the same time. This allows multiple score compositions to be performed relatively in-sync (excluding individual playing failures).
- Can be used in conjunction with Chorus.
- You may need to channel change in order to receive the "Beautiful Harmony, Jam" quest.
|
Beautiful Harmony, Jam
| How to Get Quest
|
Acquire Rank F Playing Instrument
|
| Briefing
|
Haha, hello! It's Nele from Emain Macha. I'm hearing rumors even from here that you're always playing music. Come stop by when you get a chance. I will teach you a special action regarding instrument playing. -Nele
|
| Objectives
|
|
| Rewards
|
- 200 Experience Points
- Jam Action
|
Chorus
- For the enchant, see Chorus (Enchant).

|
If you are aware of this action, then you may hold a Music Jam Band. When a fellow party member uses this action, the party members will sing a song instead of playing instruments. When the party leader uses either Chorus or Jam Session, the playing will begin. This action is only available to those with Rank C or above in Song and Musical Knowledge.
- Requires at least Song and Musical Knowledge at Rank C in order to learn. Once these requirements are met, the player will soon receive the quest A Delightful Harmony.
- By using this action, the player will prepare the use of a Microphone while in a Jam Band party.
- When the party leader uses this action, all players who have prepared Jam Session and/or Chorus will begin playing songs at the same time. This allows multiple score compositions to be performed relatively in-sync (excluding individual playing failures).
- Can be used in conjunction with Jam Session.
|
A Delightful Harmony
| How to Get Quest
|
Reach Rank C Musical Knowledge.
|
| Briefing
|
Rumor has it you have taken an interest in singing lately. Did you ever think of singing in a Chorus? If you and your friends are jamming out, you can use the Chorus action to sing along instead of playing an instrument. Tell you what: You get your Song skill to Rank A, and I'll teach you the Chorus action. - Nele -
|
| Objectives
|
|
| Rewards
|
- 1000 Experience Points
- Chorus Action
|
Freestyle Jam

|
If you are aware of this action, then you may hold a Freestyle Jam. A treble clef is placed near the player, allowing other players to jam to the same song without needing a score scroll.
- Obtained through equipping any instrument.
- Using the skill starts the Freestyle Jam with the current equipped instrument and score scroll by the host.
- During Freestyle Jam, a glowing treble clef appears near the host. Other players can click on this symbol to join in.
- Once the Jam is started, a countdown from 4 will repeat until F1 is pressed.
- Pressing F1 when the circle turns red performs a flawless spin. Messing up causes the player to perform a more awkward, tumbling gesture.
- In order to play the same song as the one hosting, players must not have any scrolls equipped.
- If the other players have scores, they will play their equipped scores instead.
- Players other than the host cannot start playing until the host starts.
- The host cannot switch instruments.
- A minigame will appear during the jam.
- Press the WASD keys in the order they appear before the bar is full to increase the combo by 1.
- If the player reaches 5 consecutive combos in a Jam with at least one other player, he/she will receive a Melody Step Effect.
- 40.0 Renown Experience from Yvona is also rewarded after performing 5 successful combos.
- Succeeding in a combo higher than 2 causes a random animal to spawn nearby to watch.
- Failing a combo causes a random monster to appear to watch, and either shrinks the player or makes his/her body huge with a tiny head.
- The monsters are harmless, and will not attack.
- Succeeding in a combo reverses the body changing effect.
- The minigame becomes increasingly more difficult as the player reaches higher combos.
- The minigame is reset to the easiest difficulty if the combo is reset.
- The fastest player in a freestyle jam to succeed in a combo each round gets a spotlight, and jams out similar to a perfect play.
- At the end, the player is rewarded with exp based on the largest combo the player achieved.
- There is also a chance that the Blessing of Cairbre will apply to the zone you are in.
- Once the song is over, applause is played and the performers bow, salute, and dance.
- Note that the player needs to continue jamming through the end of the song in order to receive the Melody Step Effect and/or the renown for getting a combo of 5
- Freestyle Jamming in specific locations or with certain Pets summoned can produce special effects after a combo is completed.
- Note that if jamming with multiple people, all players in a jam need to successfully complete a combo in order for the effect to appear
|
Freestyle Jam Special Effects
[show]
Blessing of Cairbre
- The Blessing of Cairbre is randomly received after a Freestyle Jam.
- Once started, the Blessing will be applied to the current zone for 30 minutes, along with a channel announcement and a music icon when viewing the map.
- All Freestyle Jam sessions started in the Blessing zone will receive additional benefits.
- The exp awarded for completion is doubled.
- Reaching 5 combo will award you with Cairbre's Bugle instead of a Melody Step Buff.
Performance

|
Use this skill if you want to be paid for playing beautiful and moving music for an audience. You must 'use' this skill before you start playing, and you will get a donation box in which the audience can put in Gold to show their appreciation.
- Obtained through equipping any instrument.
- When the player uses the Playing Instrument skill, he/she will put a box out in front so that listening users can donate Gold.
- Other players can drag and drop gold from inventory into the box to donate.
- Even when there is no music/animation while playing, the donation box will still appear.
|
Sketch

|
The skill for drawing a sketch of an animal or an artifact on paper. You can purchase sketch paper from the General Shop and/or other such shops.
- Learned automatically upon completion of an Iria continent Beginner Quest or by using Sketch Paper.
- Using Sketch Paper, the player may make a sketch of a monster or artifact, and may gain Exploration experience.
- It is not possible to sketch anything outside of Iria, and only monsters and artifacts can be sketched inside Iria.
- If the monster moves out of the location where the player started sketching, the attempt will fail.
- Monsters moving slightly are able to be sketched on Samhain (Saturday), however.
- A dead monster cannot be sketched.
- Certain monsters cannot be sketched more than once (e.g. Arc Lich).
- There is a one minute and thirty second cooldown time after a successful sketch.
- Sketches act as a way point. For example, viewing a sketched artifact/monster will create a marker on the player's minimap, indicating where they sketched sketched the monster. This can be useful for remembering where certain artifacts/monsters spawn.
- Certain monsters, such as any Dragon, may not display anything on the sketched paper.
- The image on the Sketch Paper will appear at the angle the character faces a monster or artifact. For example, sketching behind the monster will display the monster's back.
- For quests, it does not matter from which angle the sketch is made.
|
L-Rod Exploration

|
A skill that helps you locate objects using a tool. When you hold the L-Rod and start searching the area, you will start getting a response from the L-Rod, in light and sound, as you draw near to the treasure, at which you will hear four loud beeps. When the L-Rod is beeping as such, click on the X hotkey and click the ground using the mouse's cursor. The L-Rod will then reveal the artifact that has been hidden nearby. If an artifact does not appear, try to click on another spot.
- Obtained through equipping any L-Rod and is required to use this action.
- Allows the player to explore and uncover hidden items, artifacts, or treasure within Iria to gain Exploration Experience.
- The action is defaulted hotkeyed as "X".
- Having the action loaded drains 1 Stamina per second.
- Sometimes when searching for artifacts in Connous's Longa Desert or anywhere in Physis, a notice will inform the player to find a different method to uncover a hidden artifact. This means to use Land Maker.
- Walking near a hidden object with Awakening of Light active will automatically uncover it in the same manner as L-Rod Exploration.
- L-Rod Exploration cannot normally be used in Uladh or the island of Belvast; exceptions include:
|
Land Maker

|
The action for transforming landscapes using a tool. Use the L-Rod of Cold Wind to either lower the sand hills, or the L-Rod of warm wind to raise the sand hills.
- Obtained through equipping a special L-Rod and is required to use this action.
- When used with a Cold Wind L-Rod or Snowfield L-Rod, the terrain in Connous's Longa Desert, anywhere in Physis, and north of Zardine's Raspa Volcano will temporarily fall, allowing the player to uncover burrowed items, artifacts, animals, and monsters for exploration experience.
- Giants may use Stomp to substitute the above L-Rods.
- The player may need to use L-Rod Exploration after digging enough.
- At Raspa Volcano, lowering the terrain and then hiding in the crater will safeguard players from the Red Dragon's Meteor.
- When used with a Warm Wind L-Rod, the terrain in Connous's Longa Desert will rise.
- The Land Maker Action has a lower finding radius than L-Rod Exploration. Due to this, it may take multiple attempts to uncover the artifact, even if the player is right next to it.
|
Hide


|
- Elf-only action. Learned after character creation.
- Turns the player transparent. Any monster aggroing the player will immediately stop targeting them.
- Using Hide on a mount will not render the pet invisible and therefore may be attacked.
- If another party member provokes a monster, the Hider can be hit by area of effect attacks or Splash Damage.
- Cannot be used in the midst of battle. The player must not have been fighting for 30 seconds in order to activate it.
- This can also be treated the same way in Engaging Bandits in Commerce when they obtain a star.
- A hider cannot attack; he/she must unhide first before attacking.
- Hide uses 5 Mana on activation, 2 Mana for the first 4 seconds, and finally 1 Mana every 2 seconds from there on.
- The version possessed by the Crystal Deer and Astral Rudolph will Hide the pet itself as well its master, if the master is mounted on it.
- The pet version will slow the pet to a walk while in use.
- Hide cannot be used during Play Dead or its "get up" animation after canceling. The animation has to be completed before Hide may be used.
|
Rock Throwing

|
You can pick up a stone from the ground and either throw it on an enemy or an object. Casting this stone will not incur any damages on the enemy, but it does work when you want to bring the attention of the enemy toward you.
- Quest is automatically obtained right after character creation, which requires you to bring Sion a Slice of Cake. Jennifer sells them as "Gift" items for 100 Gold.
- Giants cannot learn Rock Throwing.
- During the Lorraine's Nightmare Event, Giants who were in the quest had Rock Throwing. Since the quest is a role-play, the action does not carry over to the actual character.
- During the Couple Breaker Event, Giants obtained the quest to learn Rock Throwing. However, the action was removed from all giants after the event ended.
- The player can pick up a stone from the ground and can throw it at objects and monsters.
- Range is 1200 (equal to a basic magic bolt).
- This is considered a Magic attack and will activate any Mana Deflector available. Classified as a Magic attack, it will never miss.
- On the contrary, attacking and finishing mobs off with Rock Throwing will count for Ranged Attack training for the respective level. In addition, Natural Shield will also activate.
- Deals no damage, but will kill opponents who are in Deadly status.
- However, if Rock Throwing is used on an enemy affected by Lullaby, the target will take damage based on Lullaby's rank.
- The rock only stuns the target for a fraction of a second, allowing enemies to immediately retaliate.
- Monsters do not animate when hit with Defense.
- Finishing a monster with Rock Throwing will not count the kill on quests.
- You cannot use the (Ctrl) Auto-Target system.
- Players with Reserve Attack on can use auto-target while the skill is loading and will execute the action on the target once it has finished loading.
- Can be used to hit switches from afar in Dungeons.
- Rock Throwing can cancel loaded skills that can be canceled from a Normal Attack.
- Uses 2 Stamina per load.
- Load time is 1.0 second.
- Throw animation lasts 1.5 seconds, and the player cannot load any skills or attack before this, leaving them vulnerable.
|
Dice Tossing

|
Use the Roll the Dice action for fun anywhere and at any time. You can purchase a dice from the General Shop.
- Obtained through equipping a Six-sided Die and is required to use this action.
- The player takes out the die. They can then click on the ground to roll it.
- The Six-sided Die will display 1-6 dots randomly.
- Throwing range is 400.
|
Throw Paper Airplane
- For the monster skill, see Paper Airplane Bomb.

|
This skill enables you to fold and throw a Paper Airplane; let's send your feelings to your beloved on a Paper Airplane. If you throw a Paper Airplane at an enemy, you might get its attention.
- Learned after completing Paper Airplane quest in which Alissa at Tir Chonaill asks for a piece of paper. The quest is achieved by gaining a level.
- Using a piece of Paper, the player may throw a paper airplane which flies in a random direction.
- The duration the plane flew and the distance the plane traveled are visually marked on the airplane after it has landed.
- Subsequent airplanes may not be thrown until it has landed.
- According to the description, the Paper Airplane aggros monsters. However, this is false.
- During the throwing animation the player gains invincibility frames.
|
- Farming is highly complex. For more information, see Farming.
Watering

|
Water the borrowed field to increase its moisture. Can only be used on the Taillteann farmland.
|
Fertilizing

|
Fertilize the borrowed field to increase its nourishment. Can only be used on the Taillteann farmland.
|
Bug Catching

|
Catch bugs in the borrowed field to increase its comfort. Can only be used on the Taillteann farmland.
|
Cylinder On-Off

|
Installs or removes an equipped Tower Cylinder.
- Obtained through equipping a Tower Cylinder and is required to use this action.
- Enables use of a Tower Cylinder in 3rd person aiming perspective.
- One can use "Screenshot mode" to change from over-the-shoulder view to Third-person view.
- Consumes 1 Stamina per second.
- It takes about 5 seconds to install or remove the Cylinder.
- During the set up process, Sharp Mind will only display question marks.
- Increases the range and power of all alchemy used.
- Range is dependent on the Alchemy used (range is increased by approximately 80%).
- The user cannot move while the Tower Cylinder is being set-up or after it is set-up.
- Press TAB to toggle aiming modes.
- Aiming Mode offers a First-Person view and must be aimed manually.
- Cursor Mode offers a First-Person view and targets can be selected with CTRL.
- Rotate the cylinder by rotating the screen.
- Getting knocked down will cancel the action.
- Cannot be used on Rafts or Hot-Air Balloons.
- Only the following projectile type alchemy can be used with this:
|
Water Balloon Throwing

|
Throws a water balloon.
- Action is received during the Water Balloon Event and can only be used during that time.
- Allows a player to toss a Water Balloon on enemy players.
- Takes 0.01 seconds to load.
- Costs no Stamina.
- Can be loaded while stunned.
- Balloons do a set damage of 10% of the opponent's HP and have a 100% Wound Rate.
- Balloons do not actually "damage" the player; the injury is shown over the character's head, but the user interface is unaffected.
|
Continent Warp

|
Allows you to move to Uladh, Belvast, or Iria.
- Automatically learned upon character creation.
- Warps the player between the continents of Uladh and Iria, as well as Belvast Island.
- Warping to Uladh will place the player in Dunbarton. Warping to Belvast Island will place the player in the Commonwealth of Belvast. Warping to Iria will place the player in Qilla Base Camp if Human, Filia if Elf, or Vales if Giant.
- If the player has never visited Dunbarton, the player will be warped to Tir Chonaill instead.
- If the player has never visited Dunbarton, but has visited Bangor, they'll be warped to Bangor instead of Tir Chonaill.
- You may not warp into the same continent you are in.
- Can only be used once until the timer resets. The timer resets at 12:00 PM and 12:00 AM in-game time.
- Warping from a residential area will always give a Continent Warp has failed message, regardless of whether it has succeeded or not.
- You cannot warp to Belvast until you have visited it at least once beforehand.
- You cannot warp while mounted.
- You can warp while players are mounted on your pet; this will bring them with you.
|
Open Umbrella

|
Press the Space Bar while using this action, and your character will jump!
- Obtained through equipping a Clear, a Frog, a Lace, Old Glory, Panda, or a Twinkle Star Umbrella and is required to use this action.
- You may not use a Parasol to obtain or use this action.
- The player holds their umbrella over their head.
- Using Rest in conjunction with this action will put you into a different Rest position.
- Pressing spacebar while using this action makes you to jump forward a few feet.
- The taller the player, the farther the jump. For example, a character that is age 17 jumps farther than a character that is age 10.
- The jump will not allow you to leap over obstacles.
- The jump has no effect on Normal/Combat Mode Stance, which also uses the spacebar as its default hotkey command.
- When using the Watering action while having this action active, the watering pot will bear the colors of the umbrella.
- When using the Fertilizing action while having this action active, the pitchfork will be an umbrella.
- When steering a raft while having this action active, the oar will be a closed umbrella.
- When using the Ladeca in Homestead while having this action active, taking off the umbrella will cause the character to have the action active without the umbrella inside the homestead.
- Fighting, using skills, summoning pets that execute a skill when summoned (e.g. Fire Storm, Thunder Storm, Ice Storm), or using other actions will cancel this action.
|
Scare
Zombie Walk
Player using Zombie Walk.

|
Use this to walk like a Zombie.
- Obtained through using the Zombie Walk Action Coupon.
- In spite of the name, the action makes the player walk a custom zombie walk and not the Zombie monster.
- The player's running speed will be reduced to a walk speed.
- Combat skills may still be used. The zombie stance will resume after the skill animation ends.
- There is no animation difference when in combat mode.
|

|
While using this action, your character will float.
- Obtained through equipping wings and is required to use this action.
- Spirit Weapon wings do not grant the action nor can be used for Spread Wings.
- Causes the player to hover in the air and glide while moving. Also, depending on the type of wings equipped, they will appear flapping.
- All effects are aesthetic.
- Using any skill, entering combat mode, or switching weapons will cancel the action.
- See Spread Wings for more information.
|

|
A skill received when you formed a bond with your special someone. The magic powder, of unknown origin, will make your body as light as air, and let you take to the skies around Doki Doki Island. Fly whenever you want! You can right-click on others and request that they Fly Together with you. Can only be used on Doki Doki Island.
- Usually tied to Doki Doki Events.
- Allows a character to fly without requiring a pet.
- The player can fly with one other player.
- See Flight Actions for more information.
|
Inflate Balloon

|
A special action just for the Club Balloon event. Use this to blow up any deflated balloons you find, then equip it or give it to your club!
|
Group Gesture

|
A special action that can be used when all party members are equipping the same special gear. If the party leader uses the action while everyone has the right equipment, the entire party will do the gesture.
- Obtained by equipping any Group Idle Equipment.
- To use the gesture, the leader must create a Party for other members to join.
- All members of the party must be wearing similar equipment for the Group Gesture to work.
|
Bolt Out of the Blue
- Not to be confused with Shockwave.

|
Use the thunderbolt that Belisha summoned to blow away all nearby enemies. You can use it once every 5 minutes.
- Obtained by equipping an Odd-Eye Belisha Support Flying Puppet and is required to be active to use the action.
- Launches five Shockwaves in rapid succession on top of the player, each dealing 1,000~ damage to all nearby enemies.
- The shockwaves occur a second after loading the action.
- Triggers Mana Deflector.
- Has a cooldown of 300 seconds or 5 minutes.
|
Yui Strike

|
If you're facing a crisis during battle, get Yui's help to escape danger!
- Obtained by equipping a Counseling Program Yui and is required to be active to use the action.
- Swings a giant flaming sword, dealing approximately 5,000 damage to all nearby enemies in a given area.
- Ignores all forms of Passive Defense.
- Certain enemies are immune to Yui Strike, that is, the attack harmlessly passes through them.
- Has a cooldown of 1800 seconds or 30 minutes.
|
Outfit Action

|
Use the special action to see what this outfit has in store.
- Obtained by equipping a Kirito SAO Outfit, Asuna SAO Outfit, Asuna ALO Outfit, Heathcliff SAO Armor, or Lisbeth SAO Outfit.
- If none of the listed outfits above is equipped upon relogging, or channel changing, the action must be relearned.
- Using the action allows the use of the unique action that comes with certain clothes.
- Changes movement and idle animations.
- Has a 3 second cooldown upon deactivating.
- Will automatically deactivate in attack or attacking a monster.
- Entering Combat mode will cancel the action, but will not cancel if used while in Combat mode.
- Does not cancel if talking to a NPC.
- Cannot be used while transformed.
- Weapon motions are based on one-hand weapon. For example, Kirito SAO Outfit cannot reenact the Dual Wielding motion from SAO animation.
|
Outfit Action 2
|
|
Use the special action to see what this outfit has in store.
- Obtained by equipping a Mysterious Snowman Robe, Night Mage Robe, Night Witch Dress or the main piece of the Hyperion Eclipse Set.
- Using the action transforms the player into a Snow bunny, Ghost Leopard, Ghost Cat, Selenian Cat or Heliotic Wolf respectively.
- There is a 5 second cooldown upon using the action.
- While in transformation, you will utilize the bonuses from the Transformation Diary.
- The transformation has no fixed bonus on its own, similar to NPC transformations.
- Can be used with any weapon.
- The transformation has the following skills for use: Smash, Defense, Counterattack, Windmill, and Rest.
- If equipped with a weapon that cannot regularly utilize these skills and/or melee attacks, the character will be unable to attack.
|
Release Sky Lantern

|
Use your skill to release the Sky Lantern.
- Action is received by completeling the daily event quest 15 times during the Sky Lantern Event.
- Takes 2 seconds to load.
- Costs no Stamina.
- The player will release a Sky Lantern into the sky, stare at it and/or wave at it as it flies. The balloon will fly off into the distance and eventually disappear from sight.
- As the player releases the sky lantern, they will be unable to take any action.
- Cannot be used inside buildings, in a Dungeon, in a Shadow Mission, or in a Theatre Mission.
|
Blow Up Balloon
|
|
You can use the Blow Up Balloon action to blow up deflated balloons.
|
Play With Pet

|
You can receive a Harmony of Affection by playing with a pet using the Pet Playset item.
- Used for Pet Harmony, by consuming a Pet Playset.
- Requires a Pet (or Partner, despite the implications) to be summoned; does not work with Fynni from Fynni Pet Whistles.
- On-use, gives the option to "Play right away", "Warm up", or "End Conversation".
- Can not be used during Commerce.
- Choosing to "Play" will ask you to "Warm up" first, or "Play anyway" [which does what; apply a buff randomly?].
- Choosing to "Warm up" will cause some dialogue from you and your pet, before giving the option to "Play" or "Quit".
- Choosing to "Quit" or "End Conversation" at any time (even while choosing a play buff) will cancel the action, not consuming the playset.
- The game may ask for confirmation, and -if quitting is confirmed- state that the pet was saddened because you ruined their excitement. This does not seem to have any adverse effects.
|
Hidden Action
These are actions that do not appear in the action window and may only be used with items or in special occasions.
Cookie Wand

|
- This skill is automatically obtained when the Cookie Wand Event is in progress.
- When clicking on a monster with a Cookie Wand equipped, this action will be used. You will also need a Baking Chocolate in your inventory.
- Each success or failure will consume 1 Baking Chocolate.
- If the action is successful, a Monster Cookie in the color of the wand used will drop by your feet.
- Success rate is determined by the Monster's Combat Power.
- Consumes ? Durability of the Cookie Wand.
|
Cure Zombie
Dragon Support

|
- During the Generation 9 Quest Adniel's Call, Adniel will give Adniel's Horn Bugle which is used for the action. It cannot be used until the fight with Claimh Solas, unless Generation 8 was completed before the battle.
- If the Horn was destroyed by the user, a new one can be received by talking to Legatus.
- Summons Adniel via Adniel's Horn Bugle to attack with Meteor.
- Unlike normal Meteors, Adniel's Meteor does not cause wounds.
- Can be hotkeyed by dragging Adniel's Horn Bugle into the Hotkey Bars/Extra Skill Slots.
- Has a targeting range of a 4800 radius from the player. The striking range is ?. Once the player has set the range by moving the mouse, clicking on the ground will execute the action.
- However, the meteors can hit outside the displayed range.
- Can only be used once per Erinn day, resetting at 6:00 AM.
- The Horn Bugle can only be used in Shadow Missions, including those that take place outside the Shadow Realm. However, it cannot be used within Rath Royal Castle because it plays inside a building.
- Warning: Can damage other players and yourself. Use with caution.
- Any monsters killed off by Adniel will not give any experience points. However, they will produce any possible items which can be picked up by anyone.
- Likewise, if a monster was heavily damaged by Adniel but not finished by it and the player delivers the finishing blow, the monster will not drop any items nor give experience.
|
Feed Fish

|
- Throws a fish for the seal pet to catch and eat.
- The player must have a fish to feed the seal in order to use this action.
- To feed a fish to a player's or a party member's summoned seal, one must right click the fish to use the "Feed Seal" option.
- Click a valid space near the seal to throw a fish for the seal to catch.
- Attempting to click the seal itself will not work, you must click near the seal.
- The seal will occasionally fail to catch the fish. This usually happens when the fish is thrown too far away from the seal.
|
Fossil Restoration
Ice Mine

|
- Activated only when Ice Mines are used.
- Used to plant an Ice Mine on the ground.
|
Install Kiosk
|
|
- Activated only when Kiosks are used.
- Used to install a Kiosk.
|
Name Color Change

|
- Activated only when Name Color Change Potions are used.
- Changes the color of your character name.
- There is no skill bubble when doing this.
- Effect is temporary and only lasts one week.
- If you rebirth, however, the effect disappears even before the one week is up.
|
Release Mini Hot-Air Balloon

|
A mini hot-air balloon launched in celebration of Children's Day.
- Action is received from using a Mini Hot Air Balloon Kit.
- Takes 2 seconds to load.
- Costs no Stamina.
- The player will release a Mini Hot Air Balloon into the sky, stare at it and/or wave at it as it flies. The balloon will fly off into the distance and eventually disappear from sight.
- The balloon has different colors on it and bears the DevCAT insignia with an antennae on its head.
- As the player releases the balloon, they will be unable to take any action.
- Cannot be used inside buildings, in a Dungeon, in a Shadow Mission, or in a Theatre Mission.
|
Run Away

|
- Used only by the Bandits.
- During Commerce, if a Bandit is successful in reaching five stars, they will attempt to use this Action and flee.
- When used, the Bandit will slowly walk away before increasing their pace. After a while, the Bandit will disappear.
- If the Bandit successfully uses this action, a portion of your cargo is permanently lost. You must kill them before they disappear in order to keep your commodities.
- Attacking them often does not interrupt the action; they will still attempt to run and disappear even while the action is not loaded. Attacking them enough times or changing their aggro state may stop the action. Charge and Lance Charge can reliably interrupt this skill.
|
Seesaw
Spirit Shift
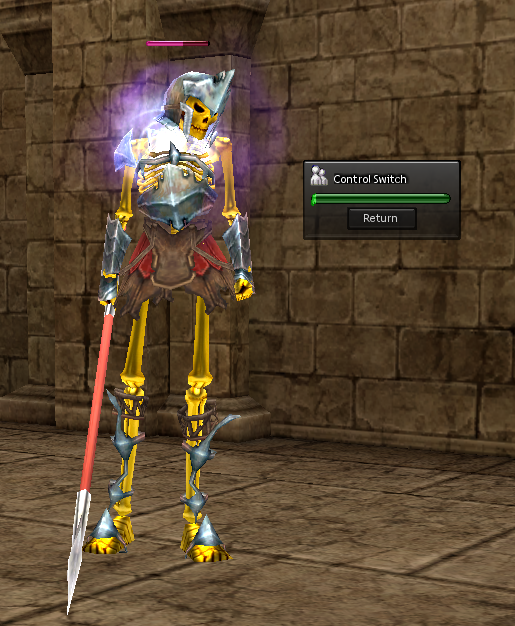
The point of view of a Possessed Gold Bone Lancer under the control of Spirit Shift.

|
- Activated only when Spirit Crystals are used.
- Allows players to directly control a Possessed Gold Bone Archer, Possessed Gold Bone Lancer, or Possessed Gold Bone Fighter, similar to Summon Golem. The player character will then automatically enter Play Dead
- All stats and skills that the monster has prior to possession are retained.
- Once possessed, a Ghost of Partholon will 'exit' the possessed body.
- Other monsters will begin targeting the player-controlled monster and recognize it as an enemy.
- Once the player cancels possession, the monster will disappear and control is returned to their character.
- Load time is 0.7 seconds.
- Target radius is 1000.
- Control time is 60 seconds.
|
Throw Confetti

|
- Activated only when Confetti Kits are used.
- Throws confetti at the direction being thrown at.
|


