- For the in-game script of this Generation, see Script - Generation 23: Tempest.
< Generation 22: Apocalypse Generation 24: Ascension >

|
This article contains spoilers.
If you do not wish to read further, please return to the home page.
|

|
- To start Generation 23, you must be cumulative level 3,000 or higher, and press Start in the chapter info.
- You do not need to clear G22 to start G23, but it is suggested to do so as to understand the story more.
- The quests in this Generation will appear under the "Apocalypse" tab.
- During the Generation Boost Event, this generation is made easier.
- Having certain items or wearing specific clothes will elicit additional dialogue from characters. Location and information will be marked with a
 . .
|
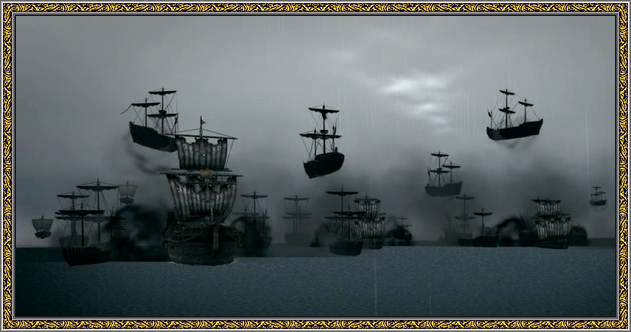
Generation 23: Tempest realizes another prophecy of the Order of the Black Moon that foretells a deadly plague and a great flood that will sweep across Erinn. Believed to be the same curse that eradicated the Partholons, the Milletians work to prevent these disasters.
NPCs involved in Tempest
NPCs involved in Apocalypse
[show]
Winter Festival
Winter Festival

|
Name
|
Winter Festival
|
NPC
|
Duncan
|
| Information
|
Winter is just around the corner, and the town is holding a festival to celebrate. Why not come back to visit? I've been wondering how you've been. - Duncan
|
| Instruction
|
- When talking to Duncan, you'll be asked if you want to continue the G23 [Winter Festival] quest or talk about something else.
- Talk to Duncan in Tir Chonaill
- Prompt: [Say you have.], [Say you have not.], [Say Nothing.]
- Purchase and use all of the souvenirs sold by the Festival Souvenir Merchant
- Play the Card Flip game by talking to the Card Game Guide
- Join the Quiz Contest by talking to the Quiz Guide
- Prompt: [Emain Macha], [Dunbarton], [Tir Chonaill], [Bangor]
- Prompt: [Church], [Town Office], [Grocery Store], [Healer's House]
- Prompt: The villagers of Tir Chonaill are the descendants of what?
- Prompt: [Earthquake], [Cold], [War], [Plague]
- Prompt: [Say you feel pretty ehh.], [Press on for the next question.], [Ask about prizes.]
- Prompt: After they were wiped out by the plague, who was the last surviving Partholonian?
- Answers: [Tir Chonaill], [Town Office], Partholon, [Plague], Any, Tuan
- Try the Picture Puzzle by talking to the Picture Puzzle Guide
- You have an option to skip the puzzle; choosing it will not affect the story or rewards.
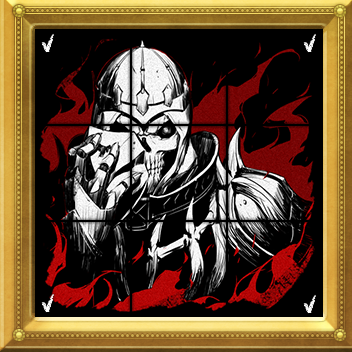
- If choosing to do the puzzle, you will be presented a 3 x 3 sliding picture puzzle of the Python Knight.
- Watch the play by talking to the Festival Guide at the town entrance after the sun has set
- Talk to the guide between 6:00PM and 6:00AM. You'll be prompted to enter the mission, A Story of Some Hero. Rewards [100,000 EXP, 10,000 G]
- Approach each campfire to listen to revelers in a trail leading to the town square.
- Reaching the town square, you'll get a dialogue, a cutscene, and dialogue again.
- Talk to the Storyteller to complete the mission.
- Complete the quest. [50,000 EXP, 5,000 G]
|
The Night Approaches

|
Name
|
The Night Approaches
|
NPC
|
Morfydrianas, Talek, Vayne, Cethlenn
|
| Information
|
You can't take your mind off of the play you just saw. Find and talk to whoever requested that story.
|
| Instruction
|
 - Find the woman wearing a dark green robe in the Tir Chonaill town square
- You'll be prompted to enter the mission, Strange Obstructions.
- You'll RP as yourself with no skills in first person view. Use the right mouse button to change the direction you're facing, use movement keys to move or strafe.
- Move forward towards the direction of Alby Dungeon while dodging the stampeding animals to charge into the mists ahead. The area you're allowed to move is limited.
- If you are hit by the animals 5 times, you'll fail the mission.
- Talk to the strange woman
- Prompt: [Did you request the play?], [About the festival...]
- Answer: [About the festival...]
- Talk to the strange woman again
- Without a prompt, you'll enter the mission, Morfydrianas. Rewards [100,000 EXP, 10,000 G]
- Fight Morfydrianas until her HP reaches 30% to trigger a cutscene.
- Talk to Vayne
- Prompt: [Balor?], [That man is Vayne.]
- Search the area
- Examine the shining spot on the ground nearby. You will be prompted to enter the mission, Lost Item. Rewards [100,000 EXP, 10,000 G]
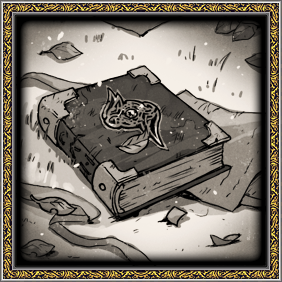
- Search the shining spots on the ground until you find the Black Book.
- Check them all, you can not pick a correct spot. The object will only appear in the 9th spot you check.
- Complete the quest. [50,000 EXP, 5,000 G]
|
Page of Darkness

|
Name
|
Page of Darkness
|
NPC
|
|
| Information
|
This seems similar to the book you saw earlier. You hesitate, but you really should check the contents.
|
| Instruction
|
- Examine the discovered book
- Use the Black Book to trigger a dialogue.
- Answer: The Revelations of the Black Moon
- Re-examine the contents of the book
- Re-examine the contents of the book
- Complete the quest. [50,000 EXP, 5,000 G]
|
Light upon the Crown

|
Name
|
Light upon the Crown
|
NPC
|
Eirawen, Llywelyn
|
| Information
|
The contents of the book seem dire. It picks up where the last one left off... Let Eirawen know about this.
|
| Instruction
|
- Talk to Eirawen at the Hanging Garden
- Talk to Llywelyn at the Hanging Garden
- Prompt: [(Read it in a jolly manner.)], [(Read it quietly.)], [(Ask what is going on.)], [(Do nothing.)]
- Prompt: [Not that important, really.], [Not so surprising.]
- Talk to Eirawen at the Hanging Garden
- Complete the quest. [50,000 EXP, 5,000 G]
|
Fever Pitch
Shadow of the Capital

|
Name
|
Shadow of the Capital
|
NPC
|
Eirawen, Llywelyn
|
| Information
|
This is a difficult situation. I must rely on you to take action. - Eirawen
|
| Instruction
|
- Talk to Eirawen at the Hanging Garden
- Through Dugald Aisle
- Talk to the sheep at the north side of Dugald Aisle Logging Camp. You'll be prompted to enter the mission, Tremors Big and Small.
- You'll RP as yourself with no skills in first person view. Use the right mouse button to change the direction you're facing, use movement keys to move or strafe.
- Move forward towards the direction of Tir Chonaill while dodging the stampeding animals to charge into the mists ahead. The area you're allowed to move is limited close to the dirt road.
- If you are hit by the animals 5 times, you'll fail the mission.
- Talk to Duncan in Tir Chonaill
- Complete the quest. [50,000 EXP, 5,000 G]
|
Fever Pitch

|
Name
|
Fever Pitch
|
NPC
|
Duncan
|
| Information
|
All of the strange events in town feel connected. I'd like to discuss these matters with you. - Duncan
|
| Instruction
|
- Talk to Duncan in Tir Chonaill
- Ask Duncan again about conditions in town
- You'll be prompted to enter the mission, Oddities around Town.
- You'll RP as yourself with no skills. You'll have 2 Speed Walk Potion (60%) (10 min). You can use Num Lock to toggle auto-run.
- Talk to the NPCs in this order: Trefor, Ranald, Deian, Alissa, and Ferghus.
- Some NPCs will be moved from their usual location. Ranald in the garden behind the school. Deian behind his barn. Alissa in the middle of town square.
- Talk to Duncan in Tir Chonaill
- Complete the quest. [50,000 EXP, 5,000 G]
|
Uneasy Remedy
Rumors on the Run

|
Name
|
Rumors on the Run
|
NPC
|
Tracy, Marleid, Manus
|
| Information
|
Oy, hero! Busy these days? I've got some stuff I want to talk to you about! You'll be by soon, right? - Tracy
|
| Instruction
|
- Talk to Tracy in Dugald Aisle
- You will given a notice about your storyline choices affecting the title you get after clearing the final mission.
- Prompt: [Why are you talking like that?], [You wanted to talk about something?], [Are you feeling well?]
- Selecting [Why are you talking like that?] will not change any points.
- Selecting [You wanted to talk about something?] will increase your Calm points by 1.
- Selecting [Are you feeling well?] will increase your Amiable points by 1.
- Investigate the lost animals
- Talk to the sheep south of the Logging Camp. You'll be prompted to enter the mission, Steps of Confusion. Rewards [100,000 EXP, 10,000 G]
- Approach the sheep again to fight 5 waves of giant white and black snakes.
- The snakes have a large hitbox, fast aggro, and a large detection range.
- Talk to Marleid near Spiral Hill
- Talk to Manus in Dunbarton
- Prompt: [About the medicine...], [(Nod in agreement.)]
- Talk to Marleid in Dunbarton
- Prompt: [(That was inappropriate.)], [(I understand, just ask next time.)], [(I do not mind.)], [(You made the right decision.)]
- Selecting [(That was inappropriate.)] will increase Calm points by 1.
- Selecting [(I understand, just ask next time.)] will increase Calm points by 1.
- Selecting [(I do not mind)] will increase Careful points by 1.
- Selecting [(You made the right decision.)] will increase Amiable points by 1.
- Complete the quest. [50,000 EXP, 5,000 G]
|
A Reflection of Fear

|
Name
|
A Reflection of Fear
|
NPC
|
Marleid, Agnes, Aodhan, Tani
|
| Information
|
We need to see how far the rumors spread. Let's head to Emain Macha. - Marleid
|
| Instruction
|
- Talk to Agnes in Emain Macha
- Talk to Aodhan in Emain Macha
- Talk to Marleid in Emain Macha
- Take a look around the Advancement Test Hall
- Head north of Emain Macha and examine the shining spot. You'll be prompted to enter the mission, Bad Contact. Rewards [100,000 EXP, 10,000 G]
- Marleid will assist you in battle.
- Defeat 3 waves of 4 kidnappers.
- Talk to Tani near the Advancement Test Hall
- Prompt: [(Explain everything.)], [(Say there is nothing to worry about.)]
- Selecting [(Explain everything)] will increase Amiable points by 1.
- Selecting [(Say there is nothing to worry about.)] will increase Calm points by 1.
- Complete the quest. [50,000 EXP, 5,000 G]
|
Back to the Nest

|
Name
|
Back to the Nest
|
NPC
|
Piran, Marleid, Tani, Eirawen, Llywelyn
|
| Information
|
I arrived in Tara, too! Umm...Let's talk when you get back! - Piran
|
| Instruction
|
- Talk to Piran in front of Rath Royal Castle
- Piran is near the front of the castle gates at Tara where you would find Lezarro.
- Talk to Eirawen at the Hanging Garden
- Talk to Piran
- Talk to Llywelyn
- Talk to Piran
- Prompt: [The Royal Castle needs you.], [This trip will be short.]
- Selecting [The Royal Castle needs you.] will increase Amiable points by 1.
- Selecting [This trip will be short.] will increase Calm points by 1.
- Complete the quest. [50,000 EXP, 5,000 G]
|
Blizzards and Sandstorms
Hot Blood of the Frozen Land

|
Name
|
Hot Blood of the Frozen Land
|
NPC
|
Bhatair, Marleid, Krug, Kirine
|
| Information
|
Let's start in Vales, where Giants reside. I've never traveled so far from the castle... - Marleid
|
| Instruction
|
- Talk to Giant at the entrance of Vales
- Talk to Krug at the Chief's House in Vales
- Take measures to prevent the plague
- Look for clues in the blizzard
- You will receive the quest, Lost in the Blizzard, which you will need to complete to advance this objective.
- Find the suspicious relic of Vales
- You will receive the quest, The Relic of Vales, which you will need to complete to advance this objective.
- Talk to Krug at the Chief's House in Vales
- Prompt: [I accept.], [I cannot take the risk.]
- Selecting [I accept.] will not change any points.
- Selecting [I cannot take the risk.] will increase Calm points by 1.
- Talk to Bhatair in front of Chief's House in Vales
- Complete the quest. [50,000 EXP, 5,000 G]
|
Preparing for the Plague

|
Name
|
Preparing for the Plague
|
NPC
|
Kirine
|
| Information
|
The plague doesn't seem to have reached Vales yet. Do what you can to prepare them for the worst.
|
| Instruction
|
- Talk to Kirine.
- Get a Gray Reindeer Hoof, Black Ice Worm Scale, and Black Buffalo Fur
- In some cases, you will only encounter 1 or 2 of these enemies. You must defeat them continuously so the game can begin spawning more of them simultaneously. "Young" variants of the enemies will not drop the required items.
- Gray Reindeer spawn at Sella Beach just above the Reindeer Mark, for Gray Reindeer Hooves. Take the Sella Beach Underground Tunnel Mana Tunnel and go a short distance east.
- Ice Worms (Black) spawn northwest of Silva Forest, for Black Ice Worm Scales. Take the Silva Forest Mana Tunnel and go search the open field to the west. If you encounter reindeer, you have gone too far.
- Black Buffalo spawn along the Reus River and Barba Basin, for Black Buffalo Furs. Take the Reus River Mana Tunnel and look south-east. Travel down the river to find the buffalo along the east bank of the frozen river.
- After gathering the items, talk to Kirine to deliver them.
- Talk to Kirine again
- Complete the quest. [50,000 EXP, 5,000 G]
|
Lost in the Blizzard

|
Name
|
Lost in the Blizzard
|
NPC
|
Weide, Marleid, Bhatair
|
| Information
|
Speak to the people of Vales about the relic, and follow up on the clues.
|
| Instruction
|
- Talk to Weide
- Find a piece of an ice pillar and talk to your allies
- After defeating the boss of Par Ruins Snow Crystal, an Ice Pillar Piece special item will appear in your inventory.
- All party members on this quest will receive the special item. You can save a Snow Crystal by joining another player's Par Ruins Snow Crystal run, regardless of whether they are doing this quest or not.
- After exiting the dungeon with the special item, talk to any of your allies in the Par Ruins dungeon lobby.
- Talk to your allies in front of Hillwen Mine
- Complete the quest. [50,000 EXP, 5,000 G]
|
The Relic of Vales

|
Name
|
The Relic of Vales
|
NPC
|
Marleid, Bhatair
|
| Information
|
Follow the clues to a place likely to be hiding the relic.
|
| Instruction
|
- Search near Hillwen Mine
- Talk to either Marleid or Bhatair. Without a prompt, you'll enter the mission, Trail in the Blizzard.
- You will RP as Morfydrianas. She has high ranking close combat, bolt magic, and alchemy skills. Using Windmill and Wind Blast is sufficient to defeat most enemies here.
- Do not remove or replace the F1 hotkey Phantasmal Sight with another skill. You will not be able to replace it and you will not be able to complete the mission without using it.
- Use Phantasmal Sight (F1). Move towards the marked circle area. Defeat the enemies that appear. Activate the shining spot after battle. Repeat these instructions three times.
- After the third shining spot, ensure that Phantasmal Sight is active then activate the Magic Cauldron to open Magic Craft. Create a Phantasmal Amalgam (Phantasmal Remnant x10, recipe requires Phantasmal Sight).
- Ensure that Phantasmal Sight is active then move towards the marked circle area to complete the mission.
- Talk to Bhatair
- Check the suspicious location
- Complete the quest. [50,000 EXP, 5,000 G, Phantasmal Sight Technique]
- A short explanation dialogue on Techniques will appear. The Techniques button on your UI bar will be enabled and you can begin collecting briogh.
- Return to the quest, Hot Blood of the Frozen Land, for further instructions.
|
Across the Sands

|
Name
|
Across the Sands
|
NPC
|
Marleid, Atrata, Bhatair, Murielle, Castanea
|
| Information
|
We've gained a... spirited new ally. Next stop, Filia. Visiting the Elf town with a Giant... We'll stop at the healer on the edge of town first. - Marleid
|
| Instruction
|
- Talk to Atrata in Filia
- Talk to Castanea at the Chief's House in Filia
- Talk to Murielle near the Healer's House
- Take measures to prevent the plague
- Find the traces scattered by the winds.
- You will receive the quest, Scattered by the Winds, which you will need to complete to advance this objective.
- Find the relic of Filia.
- You will receive the quest, The Relic of Filia, which you will need to complete to advance this objective.
- Talk to Castanea at the Chief's House in Filia
- Complete the quest. [50,000 EXP, 5,000 G]
|
Preparing for the Plague

|
Name
|
Preparing for the Plague
|
NPC
|
Atrata
|
| Information
|
The plague doesn't seem to have reached Filia yet. Do what you can to prepare them.
|
| Instruction
|
- Talk to Atrata
- Deliver 1 Rock Scorpion Sac, 1 Armadillo Claw, and 1 Red Cobra Scale.
- Regardless of what is written in the objective, you are to obtain Venomous Rock Scorpion Venom Sac, Black Armadillo Claw, and Red Horn Cobra Scale. You can not substitute an item with another variant.
- In some cases, you will only encounter 1 or 2 of these enemies. You must defeat them continuously so the game can begin spawning more of them simultaneously. "Young" variants of the enemies will not drop the required items.
- Black Armadillos spawn south of Filia, straight south of the Healer's House. You won't find any Black Armadillo until you go far enough for desert winds to start blowing. If you encounter White-tailed Mongoose, you've gone too far.
- Venomous Rock Scorpions spawn in Rupes Desert. Take the Rupes Desert North Region Mana Tunnel and go to the upper-left area, inside the text "Rupes" on the map.
- Red Horn Cobras spawn in Rupes Desert. Go to the lower-right area of the Rupes Desert distinct land formation, south of the "s D" in the text "Rupes Desert" on the map.
- After gathering the items, talk to Atrata to deliver them.
- Talk to Atrata again
- Complete the quest. [50,000 EXP, 5,000 G]
|
Scattered by the Winds

|
Name
|
Scattered by the Winds
|
NPC
|
Hagel
|
| Information
|
Find the traces scattered by the winds. Learn about the relic from the townspeople of Filia and look for clues.
|
| Instruction
|
- Talk to Hagel
- Talk to your allies after finding the water.
- After reaching the boss room of Longa Desert Topaz Ruins, a Fresh Water Bottle special item will appear in your inventory. You do not have to defeat the boss. You may exit by logging out or any method of teleporting away.
- All party members on this quest will receive the special item. The item is tradable to other players.
- While it is not required to defeat the Topaz Magic Golem boss, you may do so by using Life Drain. Defeating the boss can get you ~11 Mysterious Arrows which are in turn used to enter Longa Desert Protector Ruins Dungeon.
- After exiting the dungeon with the special item, talk to any of your allies outside the entrance to Filia.
- Complete the quest. [50,000 EXP, 5,000 G]
|
The Relic of Filia

|
Name
|
The Relic of Filia
|
NPC
|
Marleid, Murielle, Bhatair
|
| Information
|
Follow the clues to a place likely to be hiding the relic.
|
| Instruction
|
- Talk to your allies near the oasis.
- Search around the oasis
- Talk to your allies again. You'll be prompted to enter the mission, Clues in the Sand. Rewards [100,000 EXP; 10,000 G]
- Marleid, Murielle, and Bhatair will assist you.
- This mission will require the use of Phantasmal Sight. If you do not meet the requirements to use it normally, you will still be able to use it during this mission. Phantasmal Sight will also have unlimited duration during this mission.
- Use Phantasmal Sight and look for event circles that will spawn various enemies of basic difficulty. There will be 10 circles in total. You must examine the shining spot on the ground after each fight before moving on.
- Notably, the second fight will have a Head Hyena. Head Hyena's Level 3 Heavy Stander renders it immune to physical attacks. Use other attacks or rely on Marleid and Murielle to defeat it slowly.
- The last shining spot will give you the Filia Relic and exit the mission.
- Talk to your allies near the oasis
- Complete the quest. [50,000 EXP, 5,000 G]
- Return to the quest, Across the Sands, for further instructions.
|
Scattered Omens
Whispers of the Jungle

|
Name
|
Whispers of the Jungle
|
NPC
|
Shamala, Marleid, Murielle, Bhatair, Akule
|
| Information
|
Now, all that's left is Cor Village. After that we should be good to leave. - Marleid
|
| Instruction
|
- Talk to Shamala.
- She will be standing with the allies near the Mana Tunnel at Cor Village.
- You will be prompted to respond to her question about "the black head" with "the book." Type in Treasure Hunter as the correct response.
- Find the relic by following Shamala.
- Shamala will appear near center of the Herba Jungle, just under the "H" on the map.
- Speak to Shamala to enter the Shadow Mission, Hints in the Forest
- Enter the mission and speak to Shamala again. You will be prompted to follow her. Approaching Shamala will result in 9 separate spawns. Clearing each spawn requires you to click on the glowing spot on the ground to proceed to the next. Follow Shamala to spawn the next set of mobs.
- Using Phantasmal Sight will show the player the next area where the monsters will spawn.
- This mission does not require the use of Phantasmal Sight, as the player can walk in the direction that Shamala is moving in to trigger the spawns normally. However, if the player does not meet the requirements to use Phantasmal Sight normally, they will still be able to use Phantasmal Sight for the duration of the mission.
- Spawns:
- After the last wave the mission will be completed and you will receive the Cor Relic.
- Talk to Akule.
- Go to the Holy Land of Shamans.
- Talk to Akule to be taken into the shadow mission, Fairy Tale.
- Talk to Millia. A cutscene will occur.
- Talk to Akule.
- Prompted: I do., (Say nothing.)
- Talk to Akule.
- Talk to Marleid.
- Complete the quest. [50,000 EXP, 5,000 G]
|
Square Compass

|
Name
|
Square Compass
|
NPC
|
Eirawen, Piran, Marleid, Llywelyn, Briana, Hans, Ilsa
|
| Information
|
I hear you're about to wrap up your business there? I'm eager to hear the details, so hurry back - Eirawen
|
| Instruction
|
- Talk to Eirawen at the Hanging Garden
- Talk to Llywelyn in the corner of Rath Royal Castle
- He is located just outside the 2nd floor entrance.
- You will receive the Investigation Notebook.
- You will be taken into the shadow mission, Concentration.
- Talk to your Muttering, Cautious, Angry, and Upset doppelgangers.
- If you find it difficult to talk to the doppelgangers, try aiming lower on their hitboxes.
- Talk to Llywelyn in the corner of Rath Royal Castle
- Talk to Briana at Rath Royal Castle 2F
- Talk to Hans at Tara Town Square
- Talk to Ilsa at the Tara General Shop
- Complete the quest. [50,000 EXP, 5,000 G]
|
Visitors

|
Name
|
Visitors
|
NPC
|
Eirawen, Piran, Marleid, Llywelyn, Murielle, Bhatair
|
| Information
|
How goes the organizing? I have something to tell you, if you have time. Come to the gardens, please. - Eirawen
|
| Instruction
|
- Talk to Eirawen at the Hanging Garden
- Prompted: (Say you found the relic.), (Remain silent.)
- Selecting (Say you found the relic.) will increase Calm points by 1.
- Selecting (Remain Silent.) will not change any points.
- A cutscene will occur.
- Talk to Marleid
- Talk to Llywelyn
- Complete the quest. [50,000 EXP, 5,000 G]
|
Scattered Omens

|
Name
|
Scattered Omens
|
NPC
|
Llywelyn, Eirawen, Marleid, Piran, Murielle, Bhatair, Aer, Shenon, Myrddin, Petra
|
| Information
|
Those who might have noticed the ominous signs... Could it be that we have all the clues we need already? If that's the case, we should start investigating. - Llywelyn
|
| Instruction
|
- Talk to Llywelyn at the Hanging Garden.
- Talk to Aer at Ceo Island
- Talk to Murielle at Ceo Island
- Talk to Shenon at Port Ceann
- Talk to Bhatair at Port Ceann
- Talk to Myrddin at Rano Beach
- Talk to Petra on a Fishing Ship on the Sea South of Iria
- Fish up the Suspicious Relic Piece
- The Relic will be a 1x1 item and will be placed inside the Me tab of the inventory.
- Myrddin and Petra do sell the Fishing Rod from their shop.
|
Dark Room

|
Name
|
Dark Room
|
NPC
|
Eirawen
|
| Information
|
I may have found someone with information regarding the relic. Are you familiar with the four Vates? - Eirawen
|
| Instruction
|
- Talk to Eirawen at the Hanging Garden
- Find Driana's lab in Tara
- Talk to the shining spot at the southeastern most part of Tara to enter the shadow mission, The Strange Lab
- Talk to all the shining spots in the room.
- There will be 5 each of Happy Rat, Hungry Rat, and Very Angry Rat. They do not aggro, and do not need to be killed.
- If you kill all of the rats, the map will reload, the rats will respawn, and you will be glitched in place when you talk to a shining spot.
- You will receive a Data from the Lab when you clear the mission.
- Check the data from the lab
|
Doubtful Threshold

|
Name
|
Doubtful Threshold
|
NPC
|
Murielle, Bhatair, Eirawen
|
| Information
|
The Vate known as Driana... I hear that she loves cake! If something about this seems suspicious, you should check it out. - Llywelyn
|
| Instruction
|
- Investigate Driana's lab again
- Talk to the shining spot to enter the shadow mission, Just in Case
- Talk to Bhatair or Murielle
- You will be taken into the shadow mission, The Expected Reveal
- Tenacious Taunt will be casted on you.
- Survive for 2-3 minutes from waves of Happy Rats, Angry Rats, and Very Angry Rats to clear the mission.
- Talk to Bhatair in front of the lab
- Talk to Eirawen at the Hanging Garden
|
The Shadow's Tail
The Shadow's Tail

|
Name
|
The Shadow's Tail
|
NPC
|
Dorren, Bhatair, Murielle, Andras, Jarlath
|
| Information
|
Dorren should know more about Driana... or Morfyd than anyone. Pay Dorren a visit in Taillteann. - Eirawen
|
| Instruction
|
- Talk to Dorren in Taillteann
- Talk to Andras in Taillteann
- Enter the Shadow Realm where Jarlath is hiding
- You will receive the quest, Jarlath's Trail, which you need to complete to move on with the quest.
- Collect 10 Suspicious Traces, which is acquired from the end reward chest of any Taillteann Shadow Missions (Andras will not assign any specific mission; see the associated below quest for more information); afterwards use the Jarlath's Trace outside the shadow realm to enter the mission Tired Researcher.
- This mission will require the use of Phantasmal Sight. If the player does not meet the requirements to use Phantasmal Sight normally, they will still be able to use Phantasmal Sight for the duration of the mission.
- Head inside Shadow Taillteann and use Phantasmal Sight to look for clues.
- Head to the Town Square and look for clues in the bushes.
- Head to the Church. Defeat the Giant Black Snake x3 + Giant White Snake x3 that spawns.
- Head to the Alchemist's House. Defeat the Giant Black Snake x3 + Giant White Snake x3 that spawns.
- Head to the Taillteann Headquarters and look for clues. Defeat the Giant Black Snake x3 + Giant White Snake x3 that spawns.
- Talk to Jarlath at the top of Taillteann Headquarters. The mission will complete and you will be transported to Taillteann's Stonehenge.
- Talk to Jarlath in Taillteann.
- Complete the quest. [50,000 EXP, 5,000 G]
|
Jarlath's Trail

|
Name
|
Jarlath's Trail
|
NPC
|
|
| Information
|
We must find Jarlath's trail and catch up to him. Given the reports that he is wandering the Shadow Realm, you might find him in Taillteann Shadow Missions. * Obtain 10 Suspicious Traces and use them to obtain Jarlath's Trace
|
| Instruction
|
- Obtain Jarlath's Trace
- Suspicious Traces drop from the end chest of any shadow mission in Taillteann. Upon receiving the 10th, they will automatically be converted into Jarlath's Trace.
- The fastest way to obtain traces is to bring willing party members into quick shadow missions like Conflict! An Unexpected Battle, and have them give you their chest keys.
- The drop rate will be 100% for the person on this part of the quest, regardless of mission difficulty.
- A solo completion of Conflict! An Unexpected Battle will result in about 4 Suspicious Traces per run.
- Extra Suspicious Traces are not useful since they cannot be passed to other characters on your account via pets or the bank, and they cannot be sold. Any excess Suspicious Traces in your inventory are removed when you use Jarlath's Trace.
- Complete the quest. [50,000 EXP, 5,000 G]
|
Brief Stakeout

|
Name
|
Brief Stakeout
|
NPC
|
Marleid, Piran, Bhatair, Murielle
|
| Information
|
Where are you? We've had a sighting! Please hurry over to Tech Duinn. I've already contacted Murielle and Bhatair. - Marleid
|
| Instruction
|
- Talk to Marleid at Tech Duinn
- Lie in wait with Marleid
- Talk to Marleid to enter the shadow mission, At the Right Moment
- The quest states to talk to her inside Tech Duinn, but instead the objective is completed by speaking to her at a ruin near the fork in the road in Sen Mag Plains.
- Defeat the enemies:
- Black Dire Wolf x1 + Wild Boar x2 + Gray Fox x2 + Volcano Wild Dog x1
- White Dire Wolf x2 + Raccoon x2 + Violent Wild Dog (Black) x1 + Violent Wild Dog (White) x1 + Wild Boar x2
- Black Dire Wolf x2 + White Dire Wolf x2 + Violent Wild Dog x1
- Black Dire Wolf x2 + White Dire Wolf x2 + Gray Fox x2
- The next wave may spawn before you finish killing the previous
- Talk to Murielle at Sen Mag Plains
- Complete the quest. [50,000 EXP, 5,000 G]
|
Unexpected Encounter
Rain and Fire
Above the Ashes

|
Name
|
Above the Ashes
|
NPC
|
Ascon, Bhatair, Murielle, Tani, Treasure Hunter
|
| Information
|
I have heard... quite a disconcerting rumor recently. If you have the time, will you please pay me a visit?. - Ascon
|
| Instruction
|
- Talk to Ascon in Port Cobh
- Prompted: (Imitate Arranz's voice.), (Retell what Arranz said.)
- Selecting (Imitate Arranz's voice.) will increase Amiable points by 1.
- Selecting (Retell what Arranz said.) will increase Careful points by 1.
- Talk to Ascon in Port Cobh
- Prompted: (Agree to go after her.), (Stay to speak to Ascon.)
- Selecting (Agree to go after her.) will increase Calm points by 1.
- Selecting (Stay to speak to Ascon.) will increase Amiable points by 1.
- You will receive a Diamond.
- Talk to Bhatair privately
- Talk to Tani near the dock
- Prompted: ..., (Say that you are sad.), (Ask if she is sad.)
- Selecting ... will increase Careful points by 1
- Selecting (Say that you are sad.) will increase Amiable points by 1.
- Selecting (Ask if she is sad.) will increase Calm points by 1.
- Prompted: (Say that you are sad.), (Say that it depends.), (Say that it is not so sad.)
- Selecting (Say that you are sad.) will increase Amiable points by 1.
- Selecting (Say that it depends.) will increase Careful points by 1.
- Selecting (Say that it is not so sad.) will increase Calm points by 1.
- Move to Belvast with the Treasure Hunter
- The quest will autocomplete. [50,000 EXP, 5,000 G]
|
Rain and Fire

|
Name
|
Rain and Fire
|
NPC
|
Treasure Hunter, Admiral Owen, Beimnech
|
| Information
|
I've got some business at Belvast. Someone to meet... Say, don't you think it's a bit chilly here? - Treasure Hunter
|
| Instruction
|
- Talk to the Treasure Hunter at Belvast
- Talk to Admiral Owen in Belvast
- Organize your thoughts someplace quiet
- Talk to the shining spot near the Lighthouse.
- Talk to Beimnech at Belvast
- You will be taken into the shadow mission, Eye of Death's Test
- After some dialogue you will fight Balor Beimnech.
- Upon reaching 70% HP, it will trigger a dialogue and he will activate Iron Will.
- Upon reaching 50% HP, it will trigger a dialogue and he will activate Vital Surge, restoring his HP back to 100% and gains an additional 10,000 HP, and gains the ability to use Fire Pillar.
- Fire Pillar is marked by six red circles that appear near him. He also cannot be attacked while casting this.
- Upon reaching 30% HP, it will trigger a dialogue followed by a cutscene, and the shadow mission will be cleared.
- Complete the quest. [50,000 EXP, 5,000 G]
|
The Blue Rumor
Belvast Restoration
City Flood Relief

|
Name
|
City Flood Relief
|
NPC
|
Shayla
|
| Information
|
There are many who have suffered in this storm. Would you be willing to aid with flood relief? You'll be rewarded based on how much you bring. - Shayla
|
| Instruction
|
*This quest does not need to be completed to advance the story. Upon logging in again, you will receive a Thick Envelope. Wait a short while to get the next quest. You only need to reach 500 contribution to complete the quest; however, doing so will mean you permanently miss out on the higher-leveled rewards. See the page on G23 Belvast Contribution for details.
- Reach 500 Contribution by giving items to Shayla.
- Complete the quest. [50,000 EXP, 5,000 G]
|
The Raging Seas
Message from the Mainland

|
Name
|
Message from the Mainland
|
NPC
|
Pongo
|
| Information
|
I hear there are heavy rains in Belvast. I hope this letter has no trouble reaching you. - Marleid
|
| Instruction
|
- Open the Thick Envelope
- Check the Thick Envelope again
- Talk to Pongo the Trade Helper in Belvast
- Complete the quest. [50,000 EXP, 5,000 G]
- A cutscene will occur, increasing the intensity of the rain in Belvast.
|
The Raging Seas
A Cautious Gesture

|
Name
|
A Cautious Gesture
|
NPC
|
Tegan, Howel
|
| Information
|
I'm not sure if the member of the Order of Lymilark has made it to port yet... But Bhatair and I will stay at the church and help Beirnes. - Murielle
|
| Instruction
|
- Talk to Tegan, the dispatched cleric
- Complete Relief Aid
- Complete A Warm Cup of Cheer
- Complete Peee-yew!
- Complete Baby, It's Cold Outside
- Talk to Tegan, the dispatched cleric
- Complete the quest. [50,000 EXP, 5,000 G]
- Belvast will start to snow along with the storm.
|
Relief Aid

|
Name
|
Relief Aid
|
NPC
|
Howel
|
| Information
|
Please find Cleric Howel and get this waterproof cloth to him. He'll be wearing a cleric's robe. You can't miss him. - Tegan
|
| Instruction
|
- Deliver supplies to Howel
- Howel is located to the west of the Garden.
- Prompted: (Ask what he needs.), (Agree right away.)
- Choosing (Ask what he needs.) will increase Careful points by 1.
- Choosing (Agree right away.) will increase Amiable points by 1.
- You will receive Quick-Drying Clothes and 1 Holy Water of Lymilark.
- Deliver the anointed Quick-Drying Clothes
- Complete the quest. [50,000 EXP, 5,000 G]
|
A Warm Cup of Cheer

|
Name
|
A Warm Cup of Cheer
|
NPC
|
Howel, Vanalen
|
| Information
|
I just wanted to ask you one more favor before you return to Tegan. Could you hear me out? - Howel
|
| Instruction
|
- Talk to Howel
- Deliver 3 Cafe Mochas to Vanalen
- You only need 3, extras will not be accepted.
- Complete the quest. [50,000 EXP, 5,000 G]
|
Peee-yew!

|
Name
|
Peee-yew!
|
NPC
|
Hiko
|
| Information
|
Hey there. Are you busy? Can I interest you in a diet supplement? - Hiko
|
| Instruction
|
- Talk to Hiko in Belvast
- Incinerate garbage in the brazier next to Tegan
- Complete the quest. [50,000 EXP, 5,000 G]
|
Baby, It's Cold Outside

|
Name
|
Baby, It's Cold Outside
|
NPC
|
Tegan
|
| Information
|
Oh no, the brazier's fire is about to go out! Could it be all that garbage you burned??. - Tegan
|
| Instruction
|
- Talk to Tegan, the dispatched cleric
- Deliver 10 pieces of firewood to Tegan
- Complete the quest. [50,000 EXP, 5,000 G]
|
Setting Sail
Setting Sail
Luck of the Sailor

|
Name
|
Luck of the Sailor
|
NPC
|
Monatte
|
| Information
|
Certain objects that get washed up by the current are being used as charms. Talk to Monatte to get one. - Owen
|
| Instruction
|
- Obtain a Sailor's Charm from Monatte.
- Complete the quest. [50,000 EXP, 5,000 G]
|
Olden Tears

|
Name
|
Olden Tears
|
NPC
|
Odran
|
| Information
|
There's a stone known as Manannan's Tear. Odran will know what you're talking about. There's been a recent report, you see... - Owen
|
| Instruction
|
- Obtain Manannan's Tear from Odran.
- Complete the quest. [50,000 EXP, 5,000 G]
|
Cold Blood

|
Name
|
Cold Blood
|
NPC
|
Treasure Hunter, Talek
|
| Information
|
The suspicious people Odran mentioned... A dark-haired adventurer with an animal...Could he mean the Treasure Hunter?
|
| Instruction
|
- Talk to the suspicious person on Scathach Beach.
- They are located at the entrance to Avalon Gate.
- Prompted: (Observe Talek.), (Check on the Treasure Hunter.)
- Choosing (Obeserve Talek.) will increase Careful points by 1.
- Choosing (Check on the Treasure Hunter.) will increase Amiable points by 1.
- You will receive Talek's Discarded Page
- Check the note Talek gave you.
- Use the page to trigger a dialogue.
- Complete the quest. [50,000 EXP, 5,000 G]
|
Sailing on a Prayer

|
Name
|
Sailing on a Prayer
|
NPC
|
Tegan
|
| Information
|
As for those clerics dispatched from the Pontiff's Court... Find out if they did anything special to survive the trip to Belvast. They're already indebted to you, so they should cooperate. - Owen
|
| Instruction
|
- Talk to Tegan, the dispatched cleric
- Complete the quest. [50,000 EXP, 5,000 G]
|
Into the Storm
Into the Storm

|
Name
|
Into the Storm
|
NPC
|
Owen, Murielle, Bhatair
|
| Information
|
We've done all we can to prepare. I'll be at the port. Meet me there. - Owen
|
| Instruction
|
 - Talk to Admiral Owen near the port.
- Talk to Murielle near the port.
- Talk to Bhatair near the port.
- Set sail into the storm.
- Talk to Admiral Owen to enter the shadow mission, Into the Storm (Note: If you are running an ultrawide resolution the light will not display on the horizon. If this occurs, set the game to windowed mode and narrow the sides down until the light appears.)
- Follow the light and travel 1200 distance to reach the destination. Choose to steer the ship "To the Left", "Continue Forward", or "To the Right" according to the light's movements.
- Each time you follow the light, the distance to destination will decrease by 90.
- When following the light, the captain may warn the path ahead is blocked by reefs and suggests going around. Choosing to break through will decrease the Ship Condition by 30%. If the Ship Condition reaches 0%, the mission will fail.
- Going off path will increase the distance to destination by 30 and cause one wave of monsters to board the ship.
- Spawns:
- Skeleton Ogre x1, Archer Skeleton x2, Spearman Skeleton x2, Bard Skeleton x2, Crew Skeleton x1
- Sometimes a wave will be accompanied by an Unstable Sahagin which must be defeated before it explodes, damaging the ship.
- Random chances of cannonballs hitting the ship will decrease the Ship Condition by 15%.
- Random chances of a Blessing of Lymilark will increase the Ship Condition by 30%.
- At 240 distance to destination, you will be prompted to Stay and fight or Escape
- If you choose to stay and fight, you will have to face 3 waves of monsters
- Wave 1: Skeleton Ogre x2, Archer Skeleton x2, Spearman Skeleton x3, Bard Skeleton x3, Crew Skeleton x2
- Wave 2: Skeleton Ogre x1, Archer Skeleton x5, Spearman Skeleton x2, Bard Skeleton x1, Crew Skeleton x3
- Wave 3: Skeleton Ogre x2, Archer Skeleton x2, Spearman Skeleton x5, Bard Skeleton x2, Crew Skeleton x1
- Choosing to Escape will automatically end the mission.
- After fighting or escaping, a cutscene will occur and you will be teleported to Scuabtuinne. You will receive the Current Compass.
- Complete the quest. [50,000 EXP, 5,000 G]
|
A Ship without Sails

|
Name
|
A Ship without Sails
|
NPC
|
Murielle, Bhatair
|
| Information
|
This must be Manannan's island. It's a lot bigger than I expected. We should take a look around. You never know what dangers may be lurking! - Murielle
|
| Instruction
|
- Talk to Murielle near the sandy shore.
- Prompted: (Split up.), (Stick together.)
- Choosing (Split up.) will increase Calm points by 1
- Choosing (Stick together.) will increase Careful points by 1
- Search the left shipwreck.
- Talk to the glowing spots around the shipwreck to find clues
- Search the right shipwreck.
- Talk to the glowing spots around the shipwreck to find clues
- Talk to Murielle near the sandy shore
- Find the seashells scattered at the entrance of the Forgotten Ruins
- There are 7 seashells to talk to. Talk to all 7 to view a cutscene.
- Complete the quest. [50,000 EXP, 5,000 G]
|
Eye Spy

|
Name
|
Eye Spy
|
NPC
|
Bhatair, Murielle, Far Darrig
|
| Information
|
Waaah? Intruders! How did they get here? And did they come to play? - Far Darrig
|
| Instruction
|
- Talk to the Far Darrig at the entrance of the Forgotten Ruins
- Prompted: (Ask about what you found near the sunken ship.), (Ask about something to eat around here.)
- Play Rock Paper Scissors with Farfar.
- The game will terminate when Farfar has won 5 games.
- Play Statues with Farfar.
- You will be taken into the shadow mission, Far Darrigs and Statues [100,000 EXP; 10,000 G]
- Move towards the Farfar according to the prompts
- Use of Anchor Rush can speed this up immensely
- Play Hide-and-Seek with the Farfar.
- Speak to any of the Far Darrig in a group to make them scatter.
- You only have to find the blue one to proceed with the quest. They will be hiding in the ruins.
- Talk to Farfar at the entrance of the Forgotten Ruins
- Complete the quest. [50,000 EXP, 5,000 G]
|
Rest and Relaxation

|
Name
|
Rest and Relaxation
|
NPC
|
Murielle, Bhatair, Farfar
|
| Information
|
I can't believe we spent the whole day dealing with those little squirts! Ugh, I'm tired and hungry! We need to take a break and eat something! - Bhatair
|
| Instruction
|
- Talk to Bhatair at the entrance of the Forgotten Ruins
- Prompted: But..., Good Idea.
- Talk to the Farfar at the entrance of the Forgotten Ruins
- You will be taken into the shadow mission, Hunger and Warmth
- You will role-play as yourself with rank Novice Combat Mastery, and your current rank of Cooking, Tasting, Defense, Smash, Counterattack, Windmill, Critical Hit, Axe Mastery, Shield Mastery, Mushroom Gathering, and Hoeing. You will also be given a Weeding Hoe, and have a Speed Walk Potion 40% (10 min) and 20 Salt in your inventory.
- If you do not have any of the skills from the list above, you will temporarily receive that skill at Rank F during the mission.
- If you do not have at least Rank 5 Cooking, you will temporarily receive Rank 5 Cooking during the mission.
- Collect a total of 3 Large Meats, 5 Hazelnut Mushrooms, 3 Shellfish.
- Give one of each of the collected ingredients to the Far Darrigs.
- There are boars to the left of the entrance of the ruins, mushrooms on the right of the entrance of the ruins, and shellfish by the ocean
- Sometimes the Hazelnut Mushrooms do not spawn. If this happens, you need to restart the mission and try again.
- Talk to Murielle and select "Mission Progression". Talk to her with "Tool Distribution" to for a Weeding Hoe, a Ladle and Cooking Pot, or a Gathering Axe.
- Talk to Murielle with two Shellfish and Hazelnut Mushrooms in your inventory.
- Cook two Steamed Mushroom and Shellfishs using Steaming at the Cooking Oven nearby, and deliver them to Murielle.
- There is a bug where Murielle does not detect the dishes in your inventory. If this happens, drop the Salt from your inventory and talk to her again. (Remember to pick it up again afterwards.)
- Talk to Bhatair with two Large Meats and two Hazelnut Mushrooms in your inventory.
- Cook two Boar and Mushroom Skewers using Baking and deliver them to Bhatair.
- Gather 5 Firewood and talk to Murielle to complete the mission. You will receive a Gathering Axe.
- Complete the quest. [50,000 EXP, 5,000 G]
|
New Path in an Old Land

|
Name
|
New Path in an Old Land
|
NPC
|
Murielle, Bhatair, Farfar, Darrig
|
| Information
|
Now that we've had time to rest and recuperate, shall we start exploring the island in earnest?. - Murielle
|
| Instruction
|
- Talk to Murielle at the Forgotten Ruins
- Talk to Farfar at the Forgotten Ruins
- You will be taken into the shadow mission, Finding Darrig
- Sketch will have no cooldown in this mission.
- Use the Far Darrig Sketch Paper that Farfar gives you to sketch the pink Far Darrigs, and give the sketch to Farfar.
- Farfar will tell you that it isn't right and will give you another Far Darrig Sketch Paper.
- You can sketch any of the pink Far Darrigs more than once.
- The mission will complete after 7 sketches.
- Talk to Darrig at the Forgotten Ruins
- Complete the quest. [50,000 EXP, 5,000 G]
|
The Long Reach

|
Name
|
The Long Reach
|
NPC
|
Murielle, Bhatair
|
| Information
|
Craft the barrier activator and use it on the barrier generator.
|
| Instruction
|
- Craft the Tranquility Barrier Activator and then talk to Murielle near the ruins
- Use Potion Making to craft the Tranquility Barrier Activator. The recipe uses 6 Empowered Tranquility Shards, obtained from clicking the shining spots scattered around the rocks in the ruins.
- You can repeatedly click the same spot, whether you get a shard when you talk to it is random.
- Approach the barrier generator and use the barrier activator
- Talk to the Tech Duinn Geata.
- Fight off Fire Slimes, Ice Slimes, and Lightning Slimes until the Tech Duinn Geata Preparation reaches 100%.
- The preparation starts at 50%, and increases by 1% every 2 seconds. The preparation will stop increasing if you leave the circle under the Geata, or the slimes come within range.
- Once the preparation reaches 100%, the mission will complete and you will be teleported to the Deception Reach Coral Forest.
- Crisis Escape may be used to stay in the circle without attracting agro, though a slime may still enter the circle due to random movement.
- You can also just play dead for the entire mission and let Bhatair and Murielle lure them away.
- The Elves' Hide action is not available in this mission, presumably because hiding in the circle would make the mission too easy. (Trying to use hide while in battle still brings up the message saying how many seconds are required until it can be used, but if you manage to run away from enemies for that long, then it still has no effect.)
- Complete the quest. [50,000 EXP, 5,000 G]
|
Going in Circles
Going in Circles

|
Name
|
Going in Circles
|
NPC
|
Murielle, Bhatair, Far Darrig
|
| Information
|
Hoh? Ho, hooohh...? Humans! It's humans! How did they get in here?! - Far Darrig
|
| Instruction
|
 Search around these corals - Talk to the Far Darrig at the entrance of the Deception Reach Coral Forest
- Search near the warp device
- Talk to the shining spot in front of the warp device to enter the shadow mission, Here! Or Maybe There!
- This mission will require the use of Phantasmal Sight. If the player does not meet the requirements to use Phantasmal Sight normally, they will still be able to use Phantasmal Sight for the duration of the mission.
- Talk to the Shivering Far Darrig.
- Use Phantasmal Sight to find the Hidden Far Darrig in the Coral Forest.
- Fight Carnivorous Corals and Haunted Corals to activate the coral props to move around the forest until you reach the Pathfinding Far Darrig.
- Fight enemies to activate coral props until you reach the Courageous Far Darrig.
- Fight the Haunted Coral that spawns, then talk to the Courageous Far Darrig again.
- Fight enemies to activate coral props until you reach the Prepared Far Darrig.
- Talk to Bhatair at the entrance of the Deception Reach Coral Forest
- Defeat 10 Scuabtuinne field monsters.
- Use the crystals to teleport around the Coral Forest.
- Once the player is finished defeating the 10 monsters, they may talk to a Far Darrig on any island, select "Maybe Later.", then select "(Go to the entrance of the labyrinth.)" to immediately teleport back to where Bhatair and Murielle are.
- Talk to Bhatair at the entrance of the Deception Reach Coral Forest
- Complete the quest. [50,000 EXP, 5,000 G]
|
A Colorful Trap

|
Name
|
A Colorful Trap
|
NPC
|
Murielle, Bhatair, Far Darrig
|
| Information
|
Bhatair and I will look into the coral reef zone while we protect the Far Darrigs. In the meantime, look for more monsters and a safe place nearby. - Murielle
|
| Instruction
|
- Search Deception Reach
- Use the crystals to teleport around the Coral Forest and talk to all 6 shining spots in the first island you get to. One of them will take you into the shadow mission, Two-Sided
- Approach the blue circle. A Coral Golem will appear.
- Use Fateweaver, select Aspect of Might, and use it on Talek.
- Use Fateweaver, select Aspect of Fortification, and use it on Talek.
- Use Fateweaver, select Aspect of Swiftness, and use it on Talek.
- Use Fateweaver, select Aspect of Focus, and use it on Talek.
- Use Fateweaver, select Aspect of Reversal, and use it on Talek.
- Use Fateweaver, select all five Aspects, and use them on Talek.
- Use Fateweaver five times on the Coral Golem. The Golem will despawn.
- Use Fateweaver, select all five Aspects, and use them on the coral.
- Return to the Expeditionary Force at the entrance of the Deception Reach Coral Forest
- The player may talk to a Far Darrig on any island, select "Maybe Later.", then select "(Go to the entrance of the labyrinth.)" to immediately teleport back to where Bhatair and Murielle are.
- Talk to the Far Darrig at the entrance of the Deception Reach Coral Forest
- Complete the quest. [50,000 EXP, 5,000 G, Fateweaver Technique]
|
The Soothing Tree

|
Name
|
The Soothing Tree
|
NPC
|
Far Darrig, Murielle, Bhatair
|
| Information
|
Will you help turn our friends back to normal? Look, look at all these herbs we gathered! Can you use these to help our friends? - Far Darrig
|
| Instruction
|
- Talk to the Far Darrig at the entrance of the Deception Reach Coral Forest
- Use the Mysterious White Leaf you received from a Far Darrig
- Gather a total of 2 Bloody Herbs, 2 Mana Herbs, 1 Sunlight Herbs, 1 Gold Herb, and 4 Base Herbs from the nearby Herb patches.
- Use Potion Making to make a HP 50 Potion. The recipe requires 1 Bloody Herb and 1 Base Herb.
- Use Potion Making to make a MP 50 Potion. The recipe requires 1 Mana Herb and 1 Base Herb.
- Use Potion Making to make a Stamina 50 Potion. The recipe requires 1 Sunlight Herb and 1 Base Herb.
- Use Potion Making to make a Wound Remedy 10 Potion. The recipe requires 1 Bloody Herb, 1 Mana Herb, 1 Gold Herb, and 1 Base Herb.
- Type WASD repeatedly in that order to fill the gauge. Failing to fill the gauge within 10 seconds will cause the mission to fail.
- Use the technique Zone of Renewal to heal Tani back to full health.
- Talk to Murielle at the entrance of the Deception Reach Coral Forest
- Talk to the Far Darrig (next to Murielle) at the entrance of the Deception Reach Coral Forest
- After being teleported to the middle of the Coral Forest, talk to the Far Darrig again. The quest marker is misleading; do not go back to the entrance.
|
A Brief Encounter

|
Name
|
A Brief Encounter
|
NPC
|
Murielle, Bhatair, Far Darrig
|
| Information
|
Thank you! Now we can play together like old times! Didn't you say you were looking for something? We'll tell you everything we know! - Far Darrig
|
| Instruction
|
- Talk to the Far Darrig at the center of the Deception Reach Coral Forest
- Talk to Murielle at the shore of Deception Reach
- Craft a Deception Barrier Activator
- Use Potion Making to craft the Deception Barrier Activator. The recipe uses 10 Empowered Deception Shards, obtained from clicking the shining spots scattered near the corals in the Deception Reach Coral Forest.
- You can repeatedly click the same spot, whether you get a shard when you talk to it is random.
- Activate the gate.
- Survive against Cethlenn and Illusion Salamanders for 3 minutes and 30 seconds.
- 5 Salamanders respawn around you every 30 seconds, replacing any existing ones.
- Easiest way is to simply ride a fast pet around in the fog without getting close to either Cethlenn or the Salamanders.
- When Cethlenn's HP falls below a certain point, he will respawn fully healed and you will proceed to the next step of the mission.
- Approach the activated Tech Duinn Geata to complete the mission. You will be teleported to the Desolation Reach.
- Complete the quest. [50,000 EXP, 5,000 G]
|
On the Brink
Generations
Reassessment

|
Name
|
Reassessment
|
NPC
|
Murielle, Bhatair
|
| Information
|
I think we've gathered quite a collection of clues since we started. If we fit the pieces together, it might help us prepare for what lies ahead. - Murielle
|
| Instruction
|
- Talk to Murielle at Desolation Reach
- Go through each clue from the clue list.
- Complete the quest. [50,000 EXP, 5,000 G]
|
On the Brink

|
Name
|
On the Brink
|
NPC
|
Bhatair, Murielle
|
| Information
|
All right... are we ready to rumble? For the trap we're surely walking into, of course! - Bhatair
|
| Instruction
|
- Talk to Bhatair at Desolation Reach
- Activate the Manannan Temple gate.
- You will be taken into the shadow mission, Home of the King
- Stall the Manannan's Servants and Haunted Coral from reaching the warp device until its recovery reaches 100%.
- The warp device's recovery starts at 50% and increases by 3% every 2 seconds. Every monster that reaches the device decreases its recovery by 1%.
- Manannan's Servants will attack you with Thunder and Lightning Bolt, as well as normal attacks, while Haunted Coral will run straight to the circle.
- Thunder is useful for its long stun.
- At 100% recovery, the mission will clear and you will be warped to Manannan's Temple.
- Enter Manannan's Temple
- Complete the quest. [50,000 EXP, 5,000 G]
|
Manannan mac Lir
Manannan mac Lir

|
Name
|
Manannan mac Lir
|
NPC
|
Bhatair, Murielle, Manannan
|
| Information
|
At the top of Scuabtuinne... Will we really find Manannan there? And... will we be able to get his help? - Murielle
|
| Instruction
|
- Talk to the man at the center of the High Temple
- Prompted: (Mention the Order of the Black Moon.), (Ask him for help.)
- Choosing (Mention the Order of the Black Moon.) will increase Careful points by 1.
- Choosing (Ask him for help.) will increase Amiable points by 1.
- Talk to Manannan again.
- You will be taken into the shadow mission, Who Rules the Sea
- It is recommended to have equipment enchanted with Lightning Elementals on all 9 equipment slots to take reduced damage from the enemies.
- Pets cannot be summoned in this mission.
- Defeat 10 Manannan's Servants. They can use Thunder and Lightning Bolt, as well as normal attacks. There are always at least 6 servants in the map, even if the remaining servants count is less.
- Survive against Manannan and his servants for 5 minutes to trigger a dialogue and clear the mission.
- If the player gets Knocked Unconscious during this fight, they will immediately resurrect with full health.
- If the player gets Knocked Unconscious more than 3 times, the mission will end in a failure.
- Manannan has Advanced Heavy Stander and is immune to all damage.
- Manannan has the following skills:
- Teleport
- Chain Cast Thunder
- Fires Lightning Rod in multiple directions around him.
- Spawns small indicators that create large water pillars, dealing continuous damage.
- Floods a significant potion of the arena with water, dealing continuous damage.
- Complete the quest. [50,000 EXP, 5,000 G]
|
Unexpected Guests

|
Name
|
Unexpected Guests
|
NPC
|
Morfydrianas, Murielle, Bhatair, Talek, Manannan
|
| Information
|
Those are the same brutes from before! Were they in on this together? I can't let this stand! Let's mop the floor with 'em! - Bhatair
|
| Instruction
|
- Talk to Morfyd.
- Talk to Murielle
- Prompted: (Ask what she's thinking.), ...
- Choosing (Ask what she's thinking.) will increase Careful points by 1.
- Choosing ... will not change any points.
- Talk to Bhatair
- Prompted: (Tell him to trust you.), (Say this is for the best.), (Tell him to take care of it.)
- Fight Morfyd and Talek.
- Fight Morfyd and Talek.
- After lowering either one of them to 20% health, Talek will transform into Mutant Talek and regain all his health. Bring his health down to 20% to complete the mission.
- Morfyd will surround herself with an impenetrable wall of Barrier Spikes. She will stop using alchemy, but will still use Phantasmal Sight and Fateweaver, and can summon 6 Alchemy Experiments.
- Mutant Talek has Advanced Heavy Stander and Natural Shield Level 3, making him immune to all ranged attacks.
- Mutant Talek can Teleport and will merely do normal attacks with Poison Attack. He can also summon a Possessed Soul.
- At 50% of Mutant Talek's health, you will obtain an Incomplete Figure.
- At 40% of Mutant Talek's health, he can summon 3 clones of himself. Dealing 5,000 damage to Mutant Talek will remove the clones. The clones will also disappear on their own after a while.
- The occurrence of summons is highly erratic. It is possible to have a run where no summons occur but it is also possible for Talek to summon 2 waves of clones within 10 seconds.
- Talk to Morfyd.
- Complete the quest. [50,000 EXP, 5,000 G, Unified Might Technique]
|
Two Knots
A Lonely Path

|
Name
|
A Lonely Path
|
NPC
|
Manannan, Balor
|
| Information
|
Morfyd and Talek have been defeated. And it looks like Manannan has made use of his powers...
|
| Instruction
|
- Talk to Manannan.
- Prompted: Why start the storm?, About Scathach..., I have no questions.
- Talk to Balor Beimnech.
- Talk to Manannan.
- Examine the area.
- Examine the white feather on the ground.
- Complete the quest. [50,000 EXP, 5,000 G]
- The heavy thunderstorm and snow on Belvast Island will cease.
|
When the Sun Remains

|
Name
|
When the Sun Remains
|
NPC
|
Altam, Avelin, Llywelyn, Pihne, Caswyn
|
| Information
|
Are you all right? Are you awake? We're not too late, are we? - Altam
|
| Instruction
|
- Talk to Altam.
- Prompted: (Ask what happened.), (Say you missed them as well.)
- Choosing (Ask what happened.) will increase Careful points by 1.
- Choosing (Say you missed them as well.) will increase Amiable points by 1.
- Talk to Avelin.
- Talk to Pihne.
- Talk to Altam.
- Talk to Llywelyn.
- Complete the quest. [50,000 EXP, 5,000 G]
|
Well-Trod Roads

|
Name
|
Well-Trod Roads
|
NPC
|
Murielle, Bhatair, Admiral Owen
|
| Information
|
Whatever happened to Murielle and Bhatair? Go look for them.
|
| Instruction
|
- Talk to Murielle.
- Talk to Bhatair
- Talk to Owen.
- Complete the quest. [50,000 EXP, 5,000 G]
|
Two Knots

|
Name
|
Two Knots
|
NPC
|
Eirawen, Marleid, Piran, Murielle, Bhatair, Duncan
|
| Information
|
Hey, where have you been? The rain stopped, and I bet you have something to do with it. Hurry back. - Eirawen
|
| Instruction
|
- Talk to Eirawen at the Hanging Garden
- Talk to Marleid
- Talk to Piran
- The Black Book will be removed from your inventory.
- Talk to Murielle at the entrance of Filia.
- Talk to Bhatair at the entrance of Vales.
- Talk to Eirawen at the Hanging Garden
- Prompted: The good., The bad.
- Prompted: Protect others., Defeat them., Uncover the plot.
- Choosing Protect others. will increase Amiable points by 1.
- Choosing Defeat them will will increase Calm points by 1.
- Choosing Uncover the plot. will increase Careful points by 1.
- Talk to Duncan in Tir Chonaill
- Write your wish on the Puppet and burn it in Tir Chonaill's Square
- Talk to the campfire to enter your wish
- The quest will auto-complete. [50,000 EXP, 5,000 G, Title: Storm Strider]
- After completing the quest, a cutscene will occur.
- You will receive one of three titles depending on the choices made during the storyline.
- Upon completion of Generation 23 and relogging in, you will receive the quest Ascent to the Throne.
|
< Generation 22: Apocalypse Generation 24: Ascension >
Trivia
- Generation 23 Part 1's trailer shows a shadow puppet defeating Balor with a slightly modified Fate/Stay Excalibur.
[show] Game Scripts Game Scripts  |
|---|
|
| Chapter 1 | | | | Chapter 2 | | | | Chapter 3 | | | | Chapter 4 | | | | Chapter 5 | | | | Chapter 6 | | | | Chapter 7 | | | | Arcana | | | | Chapter 8 | | | | Event | | | | Other | |
|
|

